Module 5 "Touching Texture"

Module 5: "Touching Texture"

A study based on textured surfaces in landscape.

Wednesday, 13 August 2014

Certificate Module 3 Chapter 9 A Resolved Sample - First Steps

SELECT A SOURCE IMAGE TO DEVELOP INTO A DESIGN

When I looked back at my sketchbook, I found that I wasn't particularly inspired by any of my images, except the ammonite.  By chance, just before starting on this chapter, I visited a local jewellery/crystal shop, fittingly called "Treasures".  I found my treasure in the shape of a beautiful little pair of ammonites.  I couldn't resist buying them, justifying the expense by telling myself I needed them for my work!

3.9.1  The ammonites

While shopping I treated myself to a coffee and sat in the cafe looking at my treasures and jotting down ideas inspired by them.


  • Over thousands of years, the original organic matter had been replaced by stone.  This made me think of myths and stories about people being turned to stone, or pillars of salt, or gold.  It gave me the idea of replacing one element by another.
  • The dullness of the outside gave no hint as to how rich and interesting the inside was.  It could be interesting to try to use this somehow in a design.
  • The shop assistant told me that the actual living creature lived just inside the entrance of the shell.  the remaining chambers remained empty, the ammonite being able to fill them with water or air, to adjust its buoyancy.  It made me think of adaptability, changing according to circumstances, another interesting concept to play with.
  • The outside of the shell reminded me of gathered fabric, drawn up more at one side and formed into a spiral.  Mmm, another idea to play with.
  • The shell provided a safe, protected place for the creature.  I find this idea very interesting too.
Well, I definitely had plenty of ideas to be going on with.

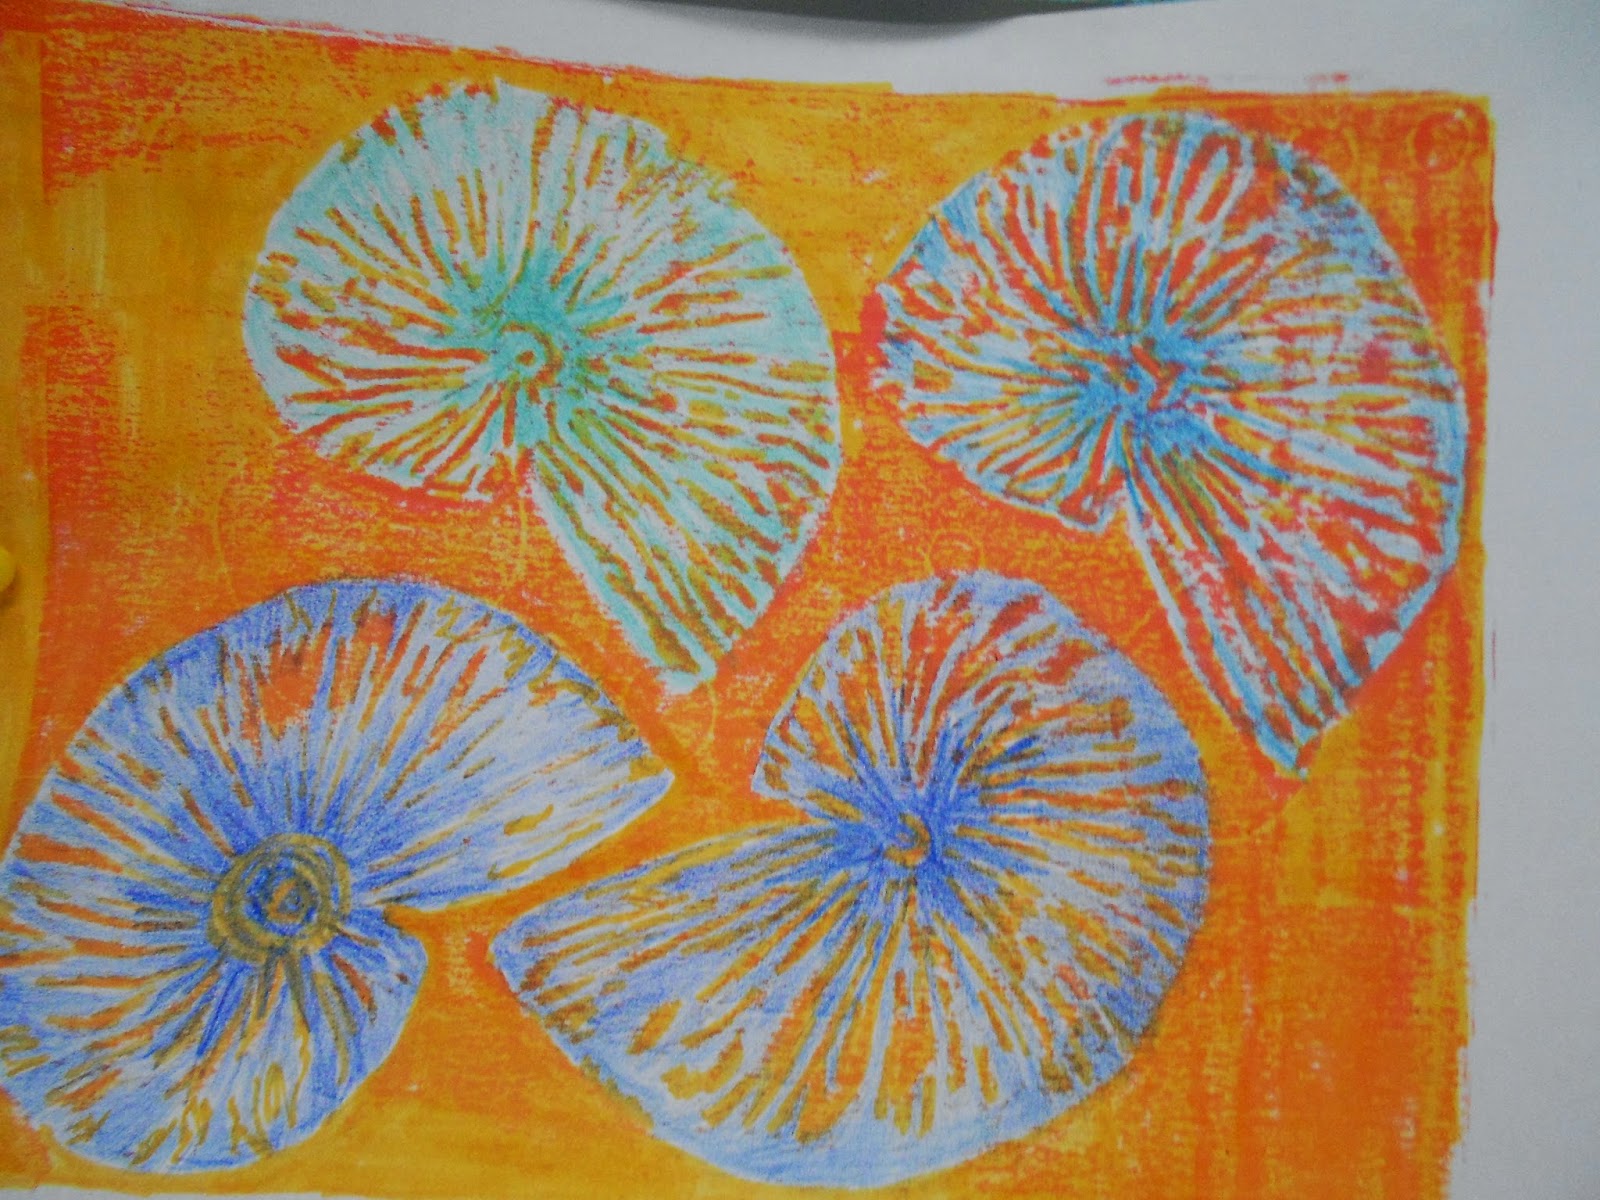
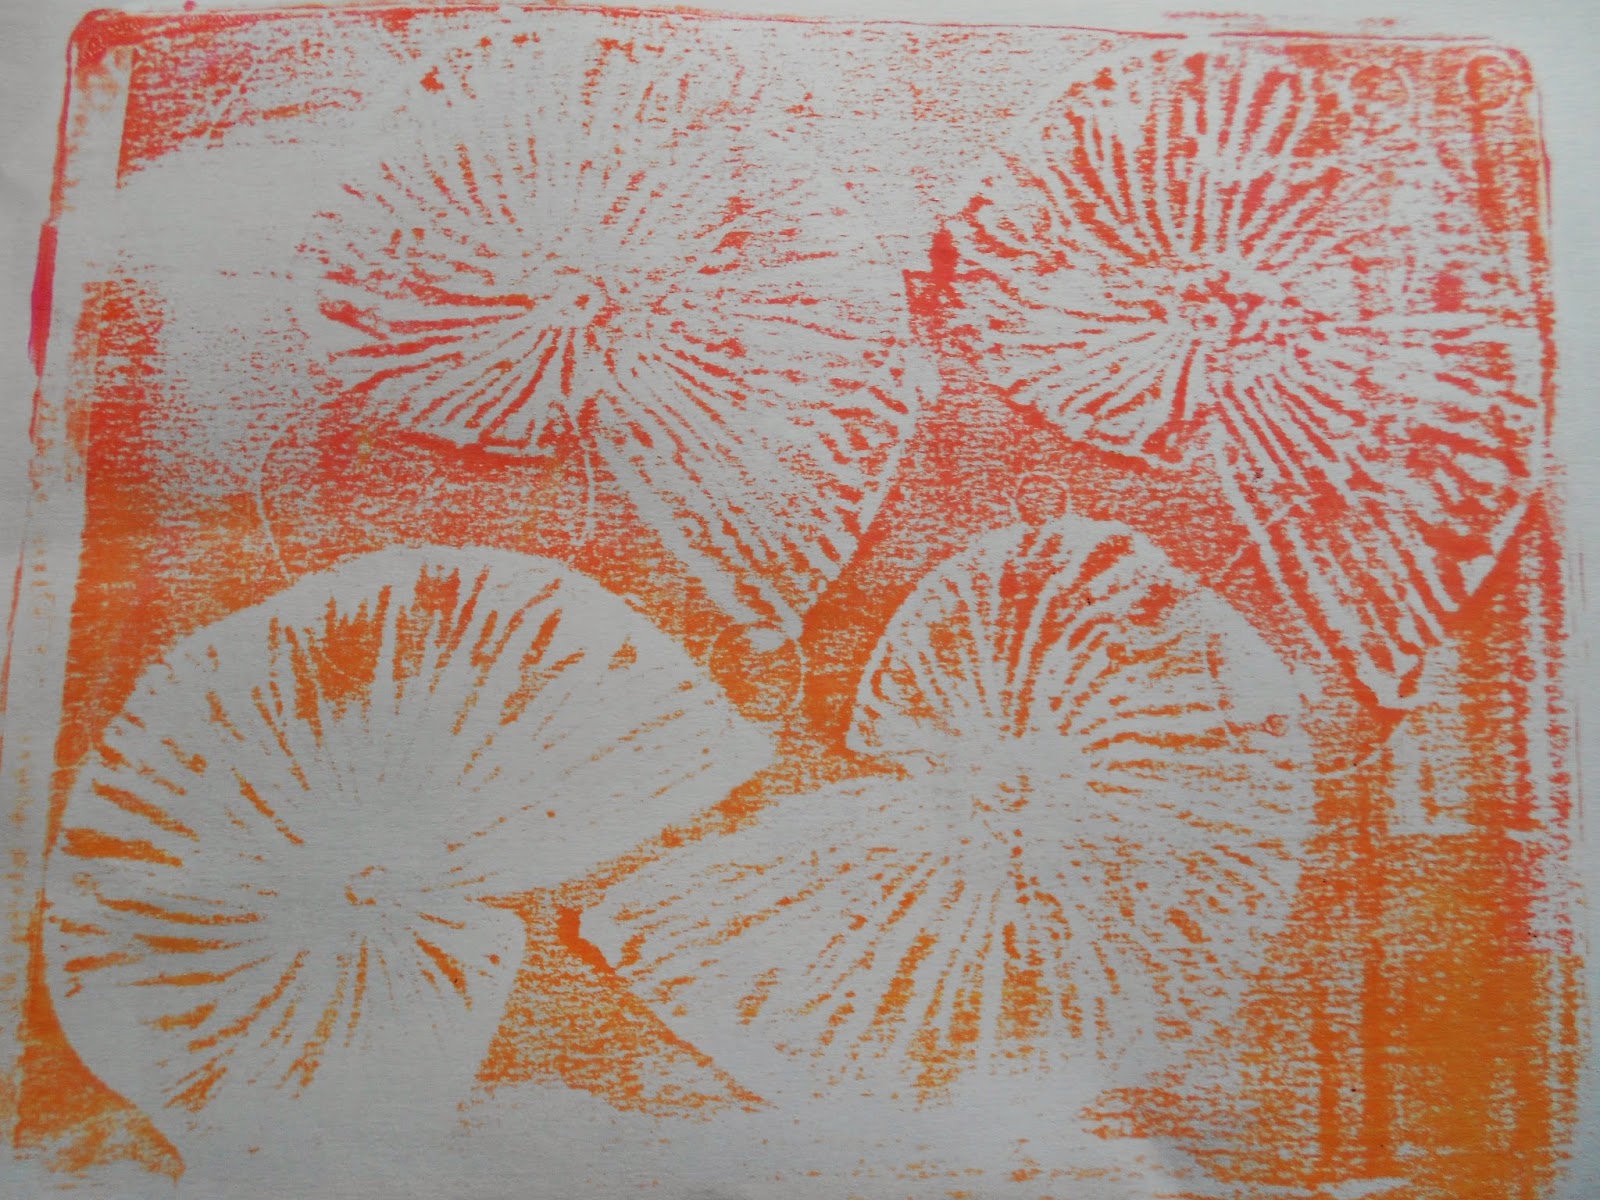
To start with, I pulled out some rather dull, uninteresting prints to see if I could develop them into something more interesting.  At the workshop which Alison King gave last week as part of the Aboyne and Deeside festival, she encouraged us to develop our prints in several ways:

  • flood the print with diluted paint.  The thicker paint used in the print, once dry, will resist the diluted paint with interesting results.
  • overprint
  • emphasise one part of the design
  • cut it up and re-assemble it
I tried all of the above ideas.

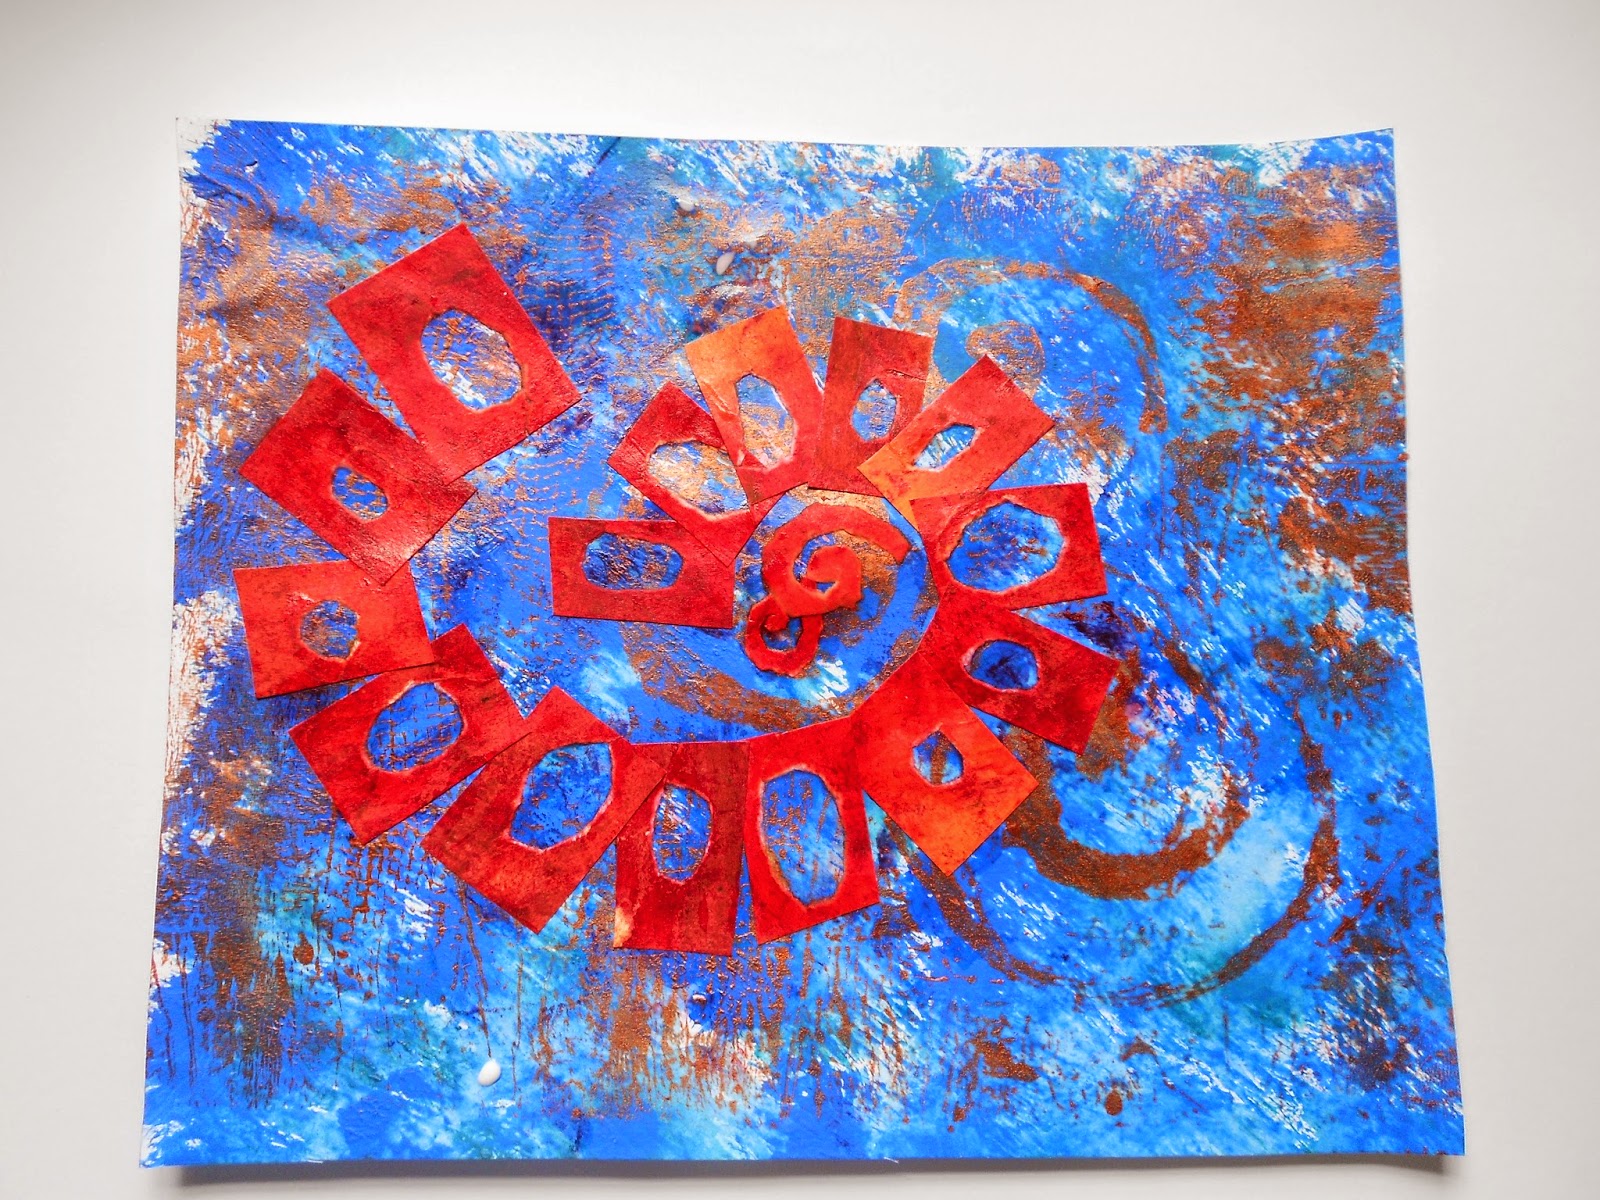
3.9.2   Cutting up and collaging elements


Once I had finished tearing up some dyed paper to make the red blobs in the image above, I was left with little rectangles of paper, which I found interesting to arrange in a spiral shape.

3.9.3

3.9.4  A rather faint image overprinted and then enhanced by working into it with coloured pencils
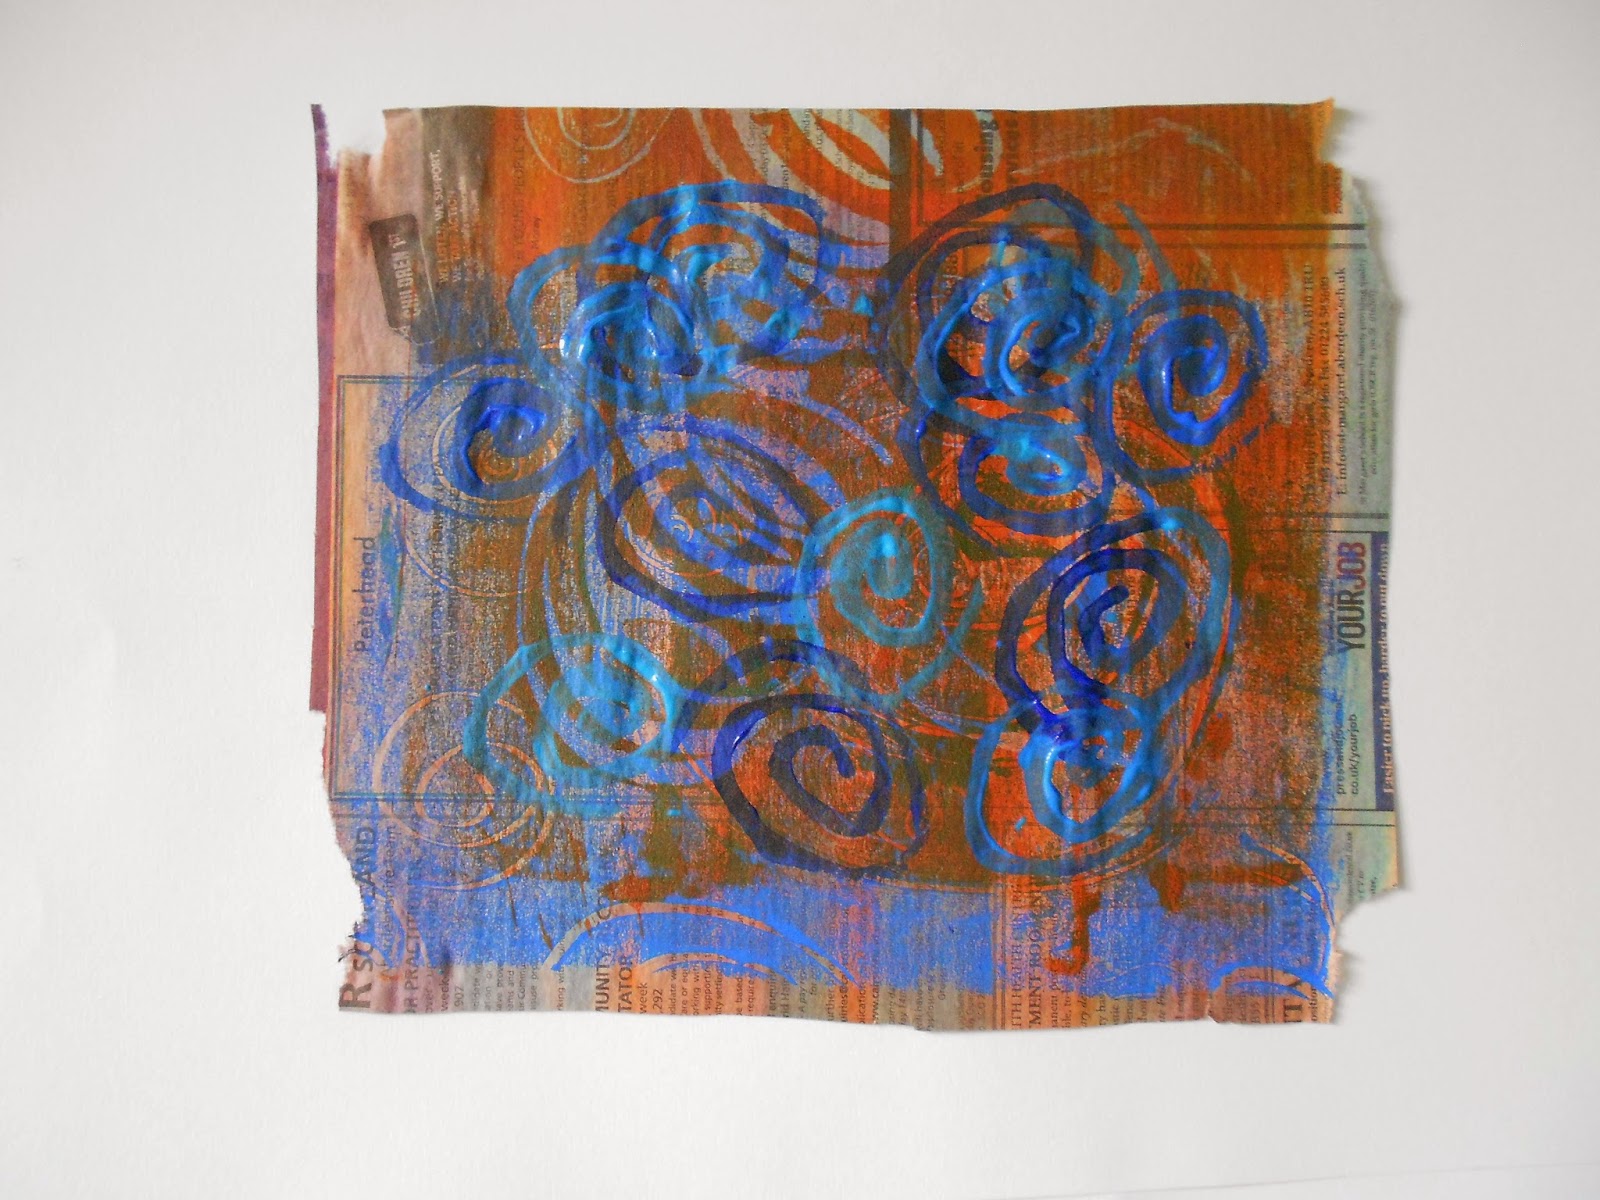
3.9.5  Overprinting again - I don't think it has rescued this print

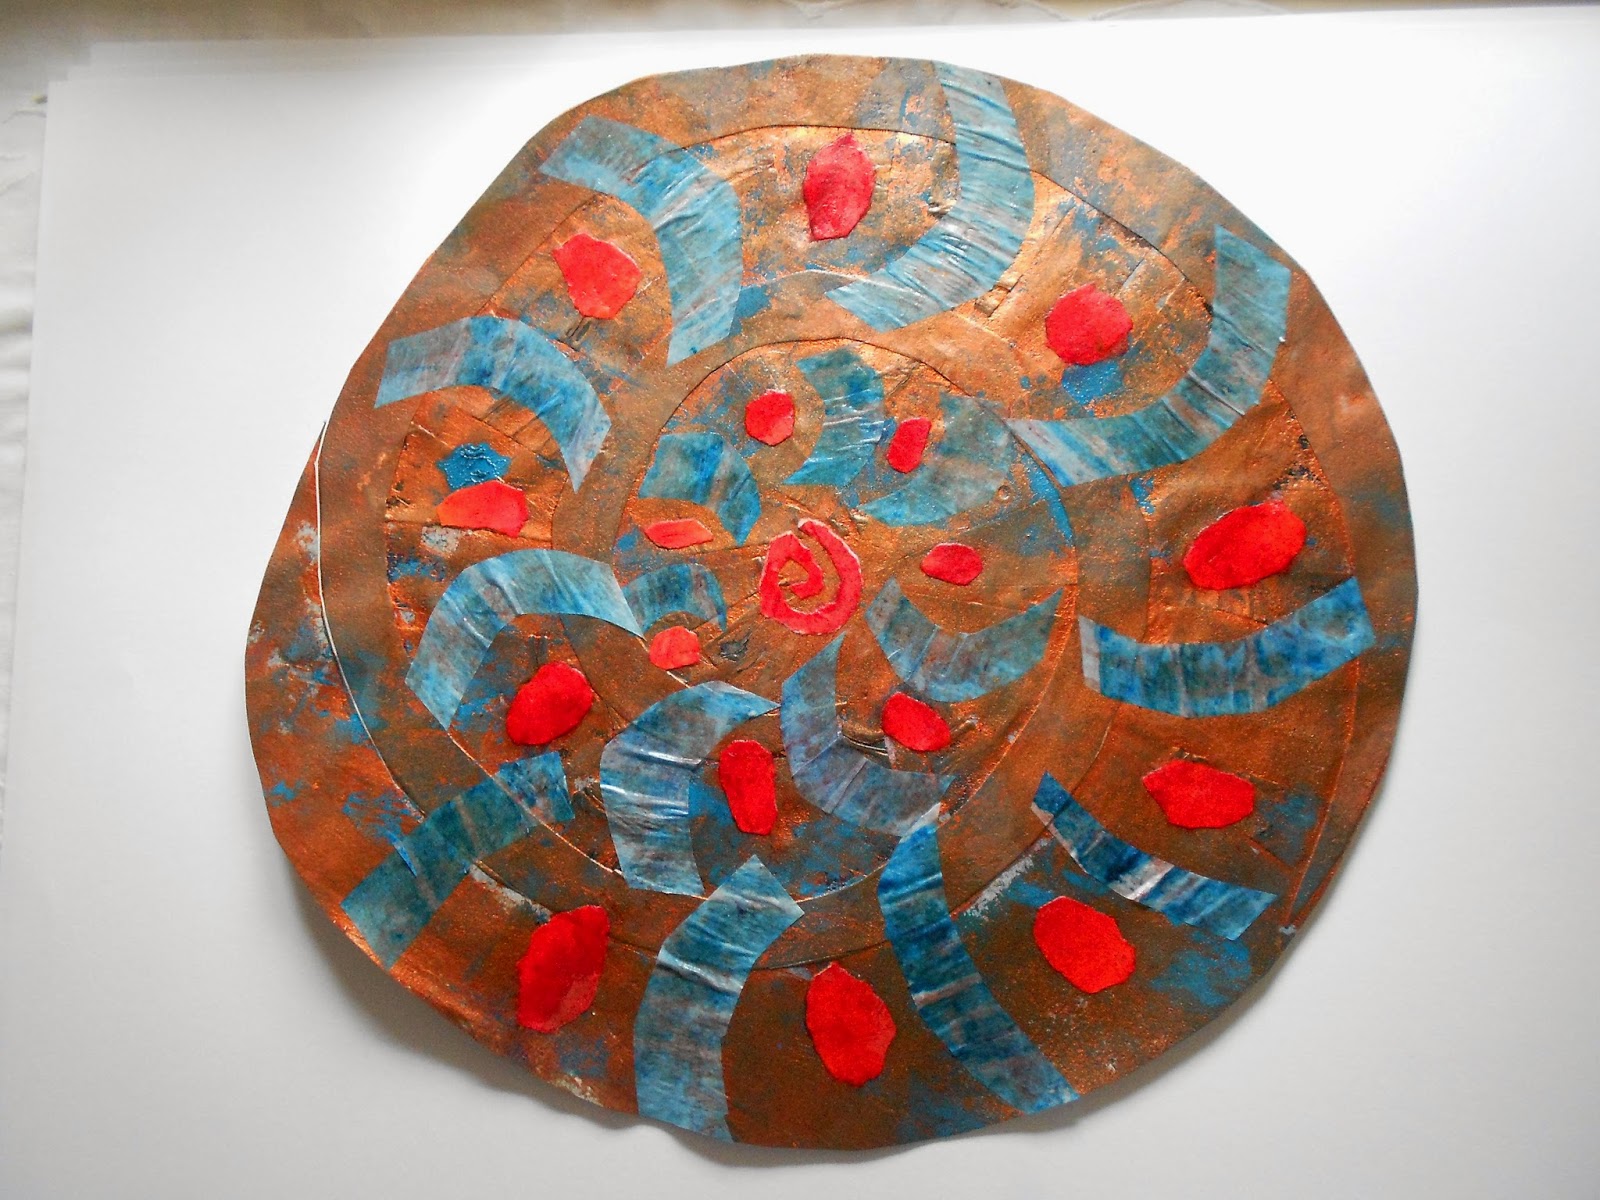
3.9.6   Flooding helped this rather wishy washy print, but not enough so I cut it up and re-assembled it as shown below

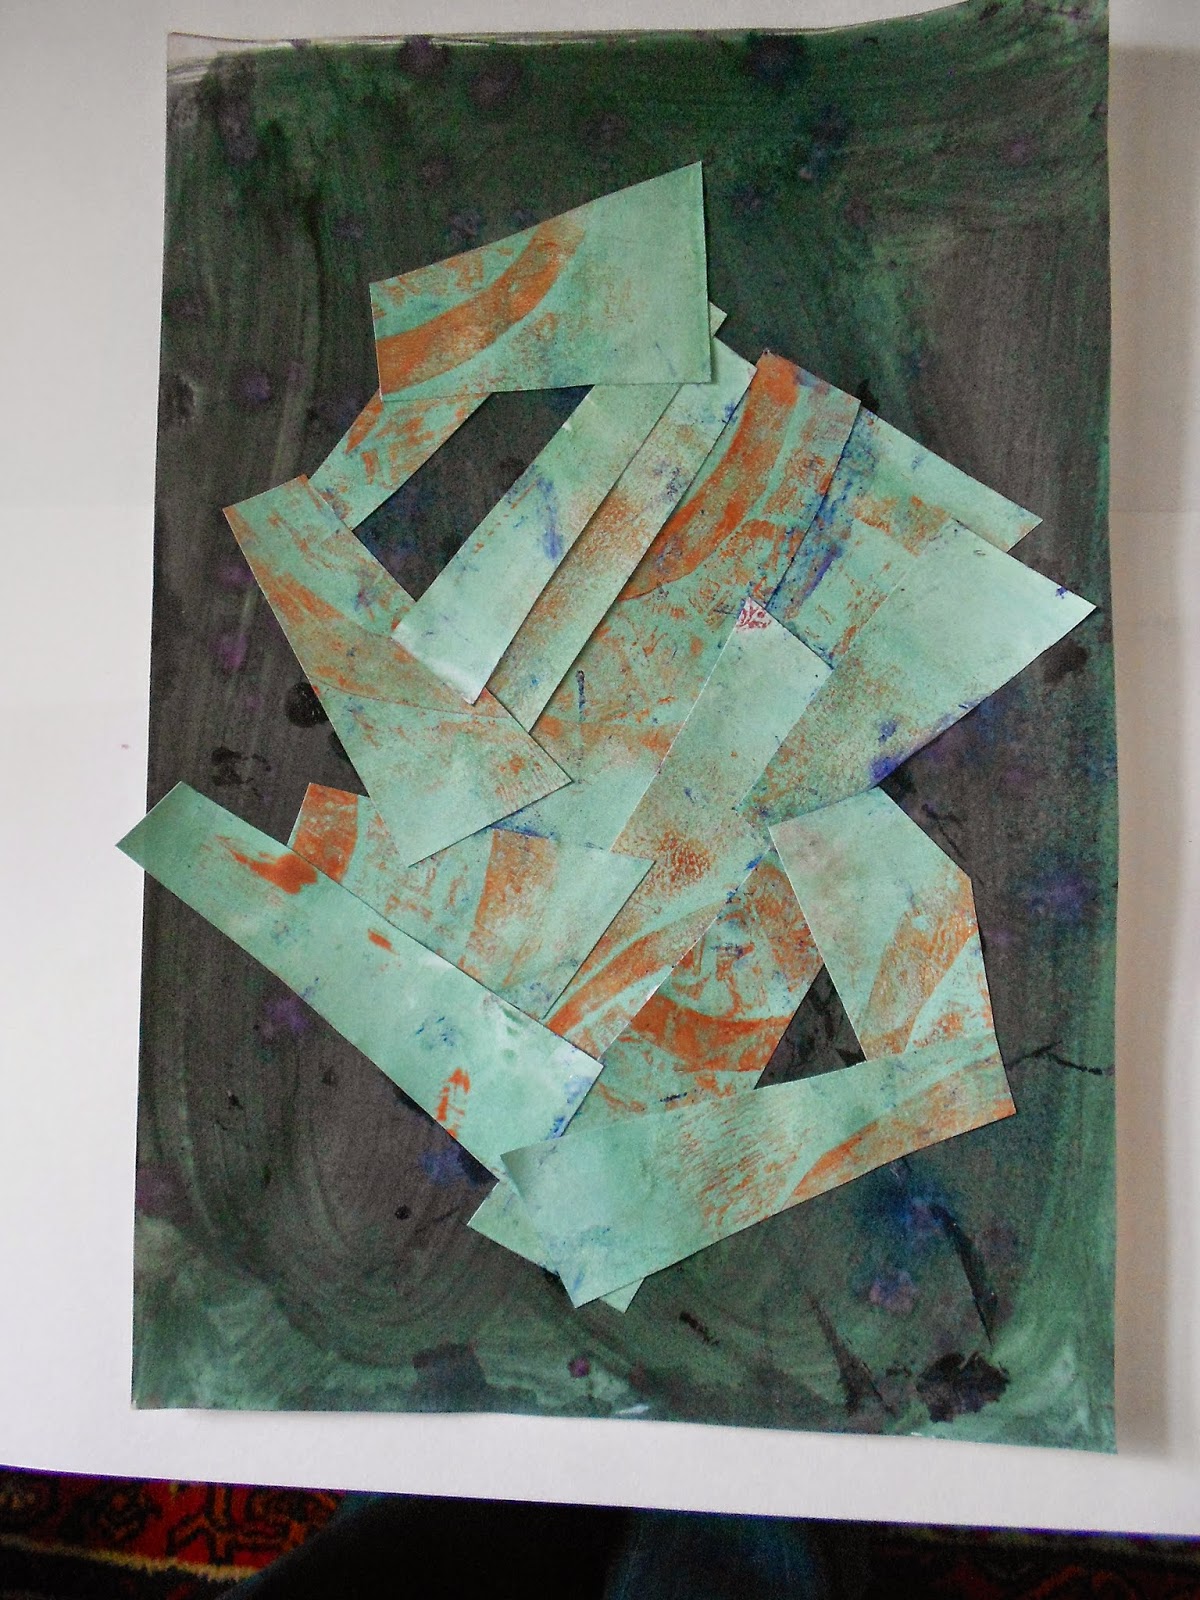
3.9.7  cutting up and re-assembling
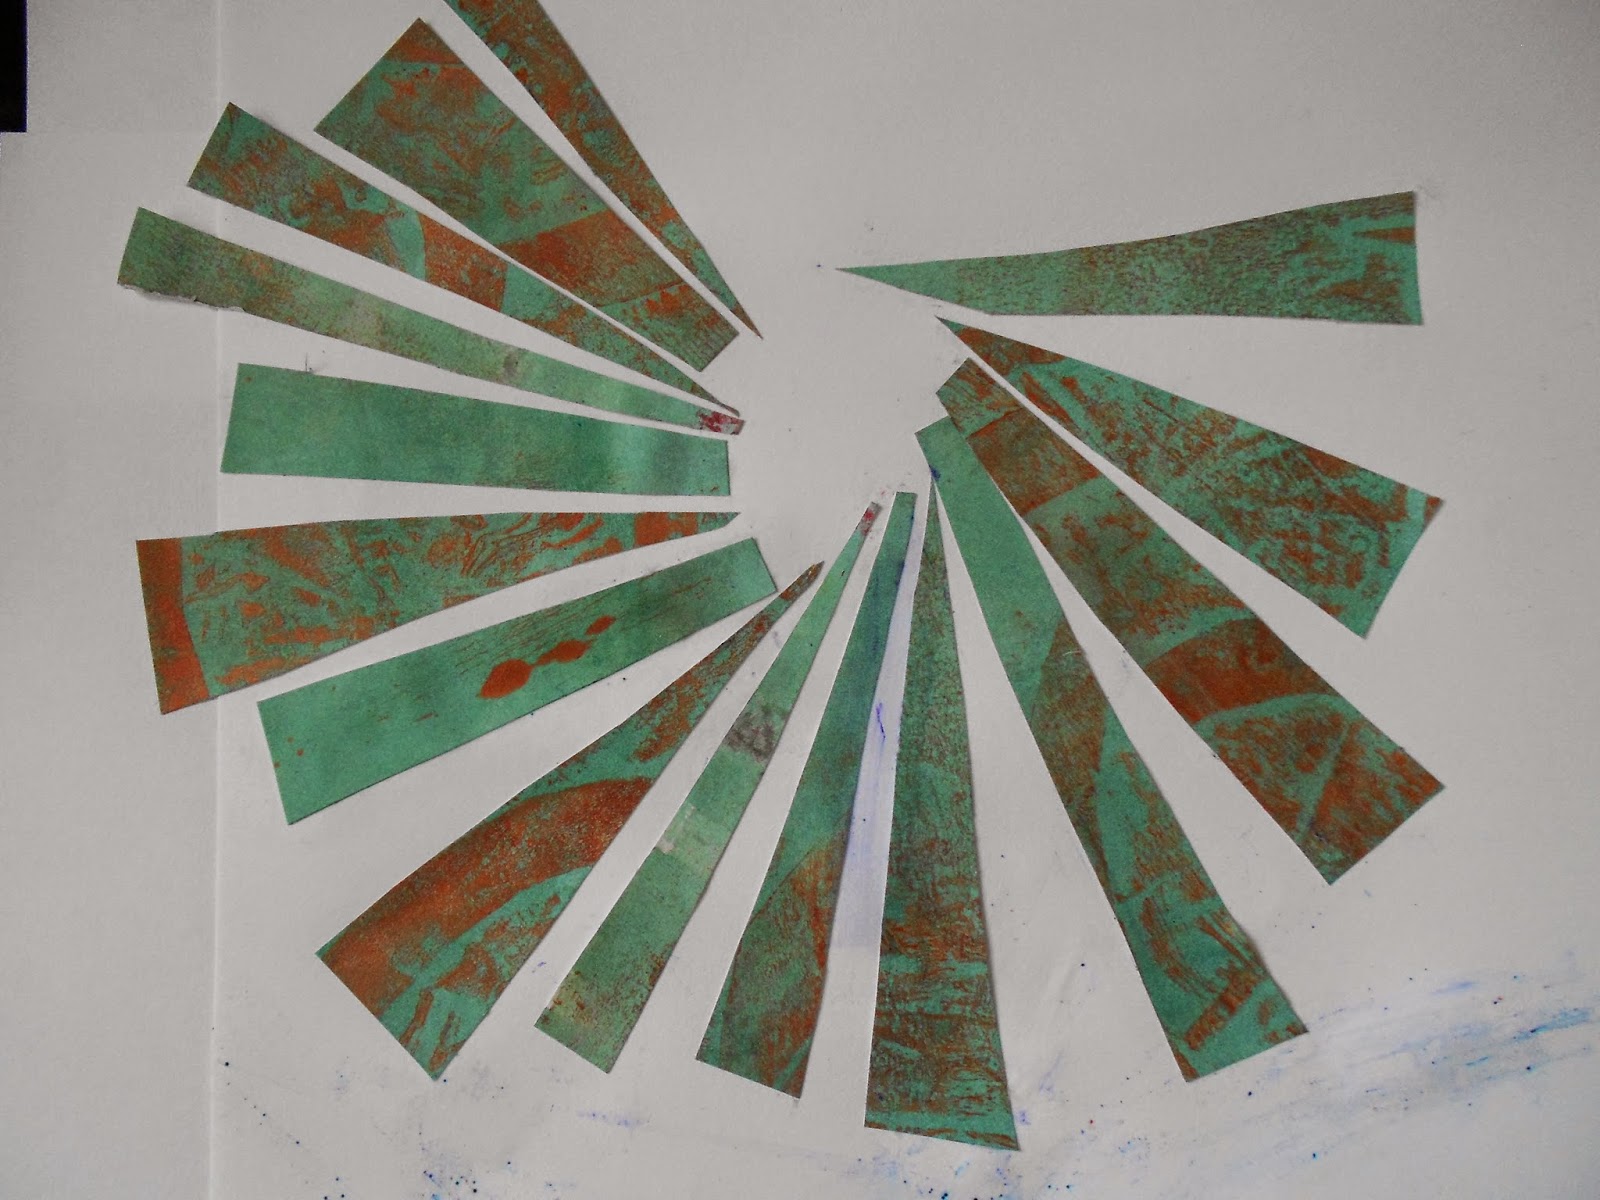
3.9.8  I had enough pieces left over to make another collage, arranging the pieces in a partial spiral


I scanned a photograph of the ammonite into my computer and played around a little with Photoshop, using reflection by flipping the image both horizontally and vertically, applying filters, and using the magic eraser to distress the image (using the idea of disintegration from Module 1)

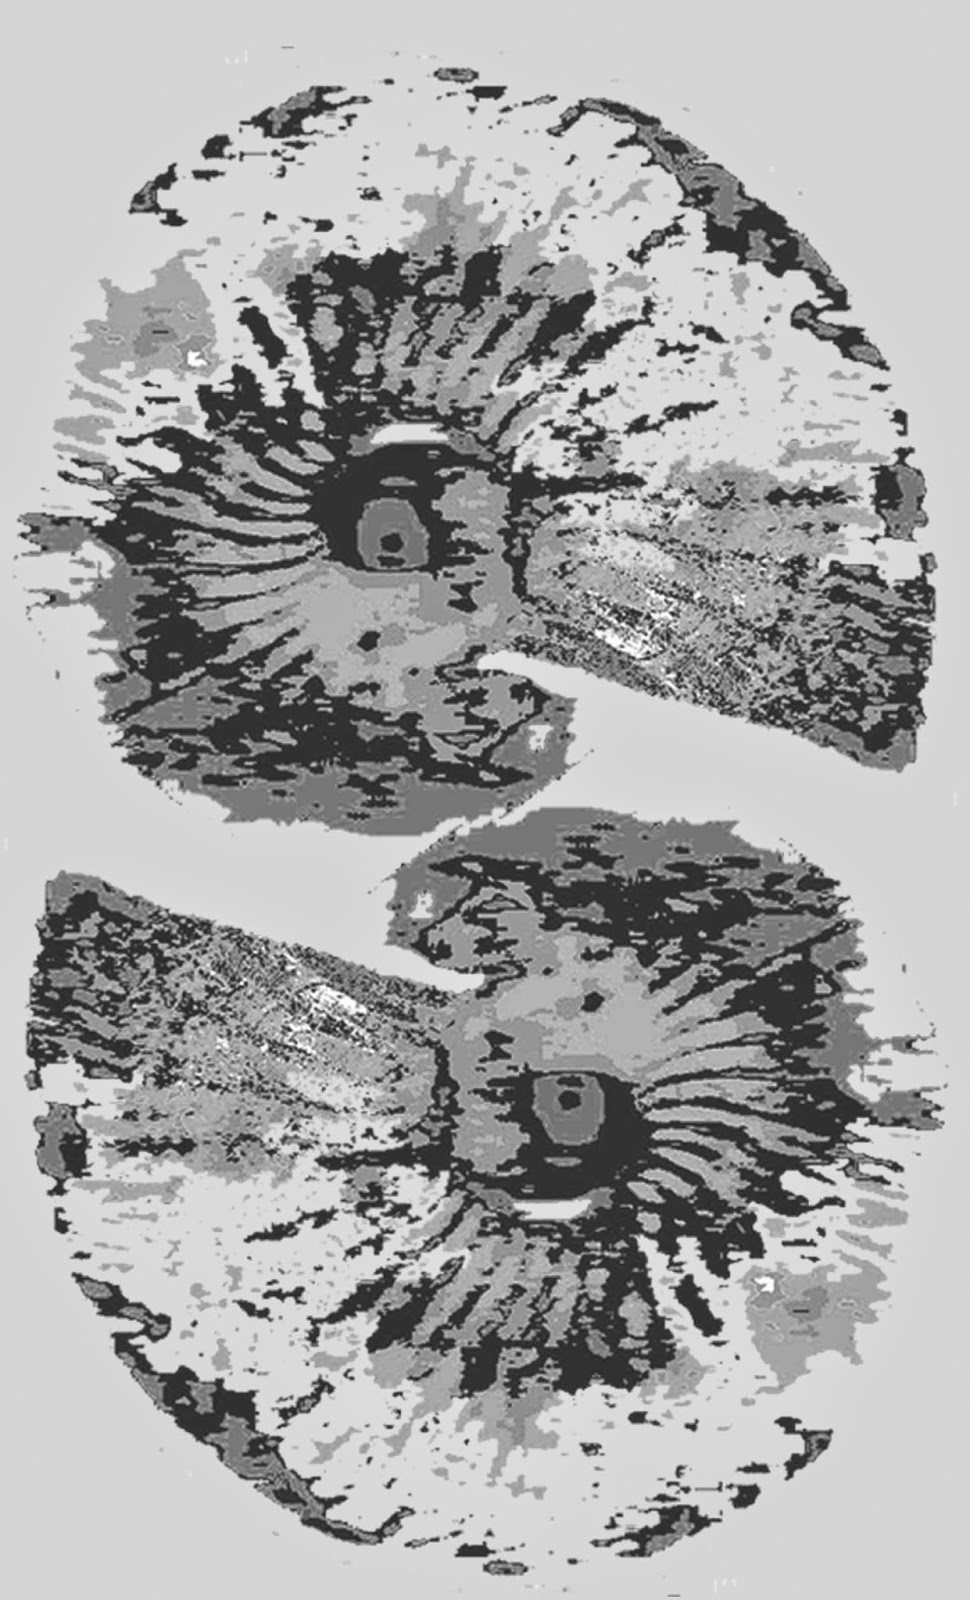
3.9.9  The ammonite photo, converted to greyscale, posterised and distressed by erasing portions

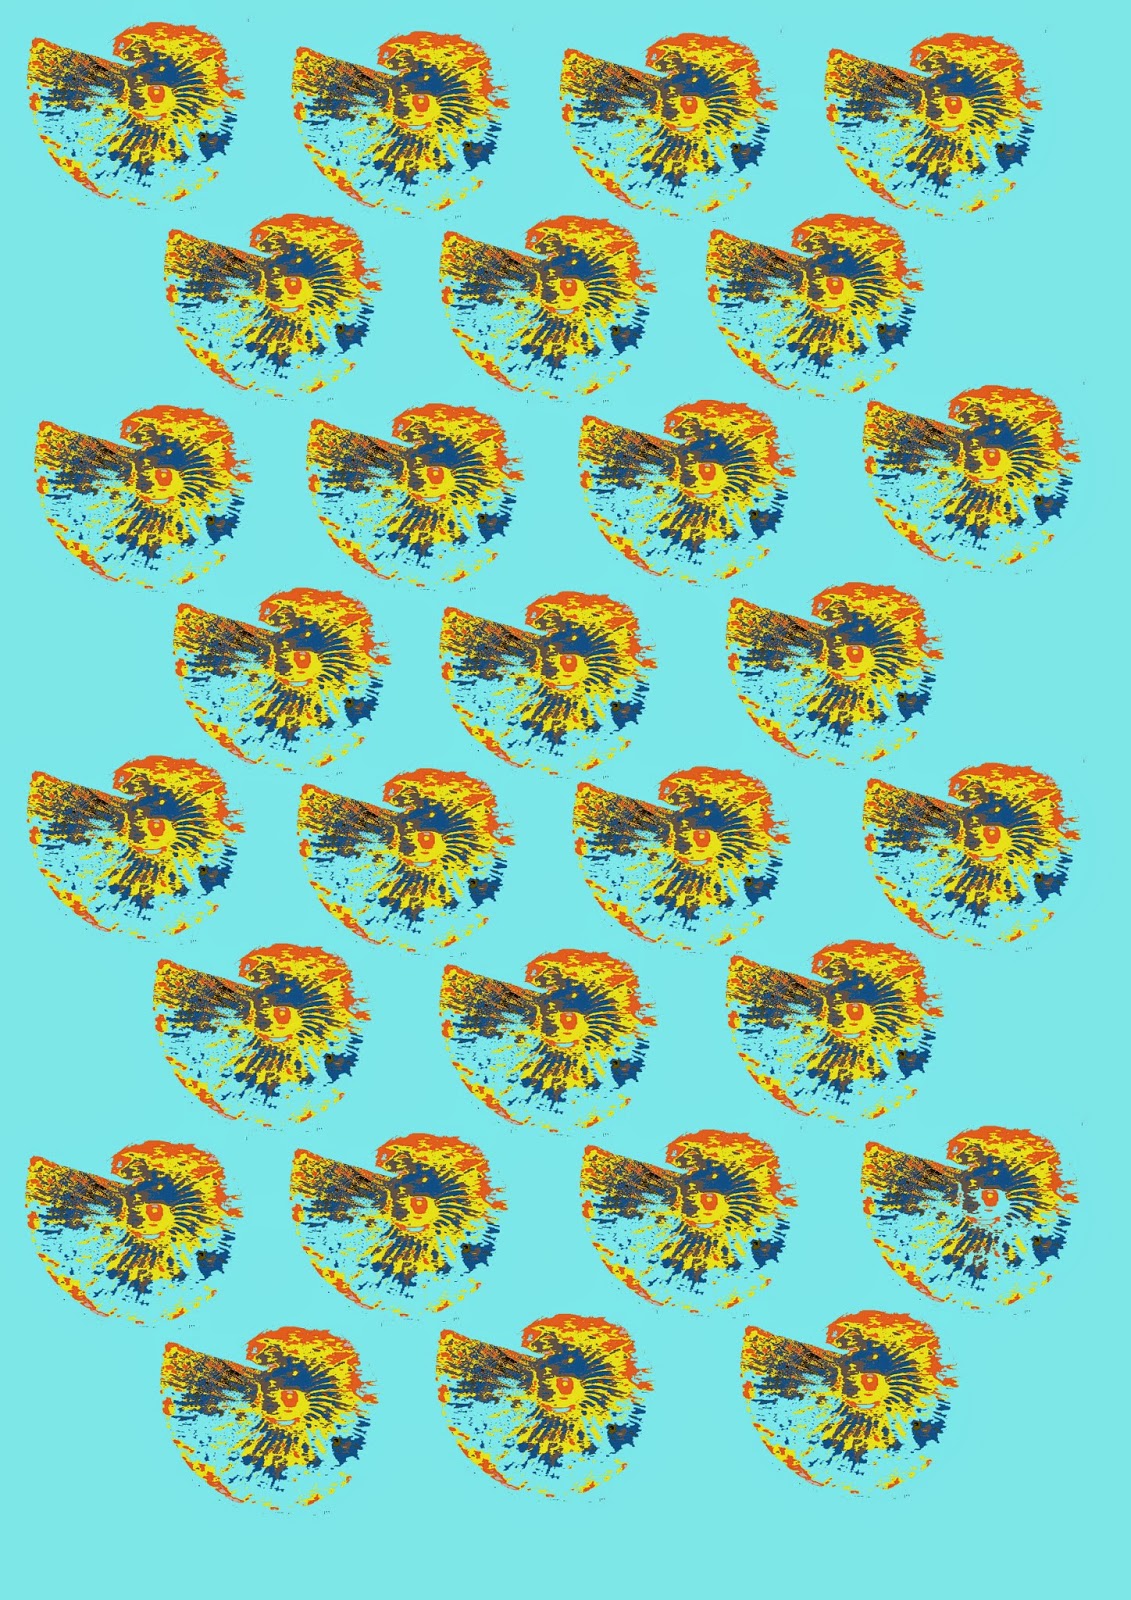
3.9.10  The ammonite photo with colour added, arrange in a half-drop pattern on a coloured background.  It looks like little yellow birds against a blue sky.

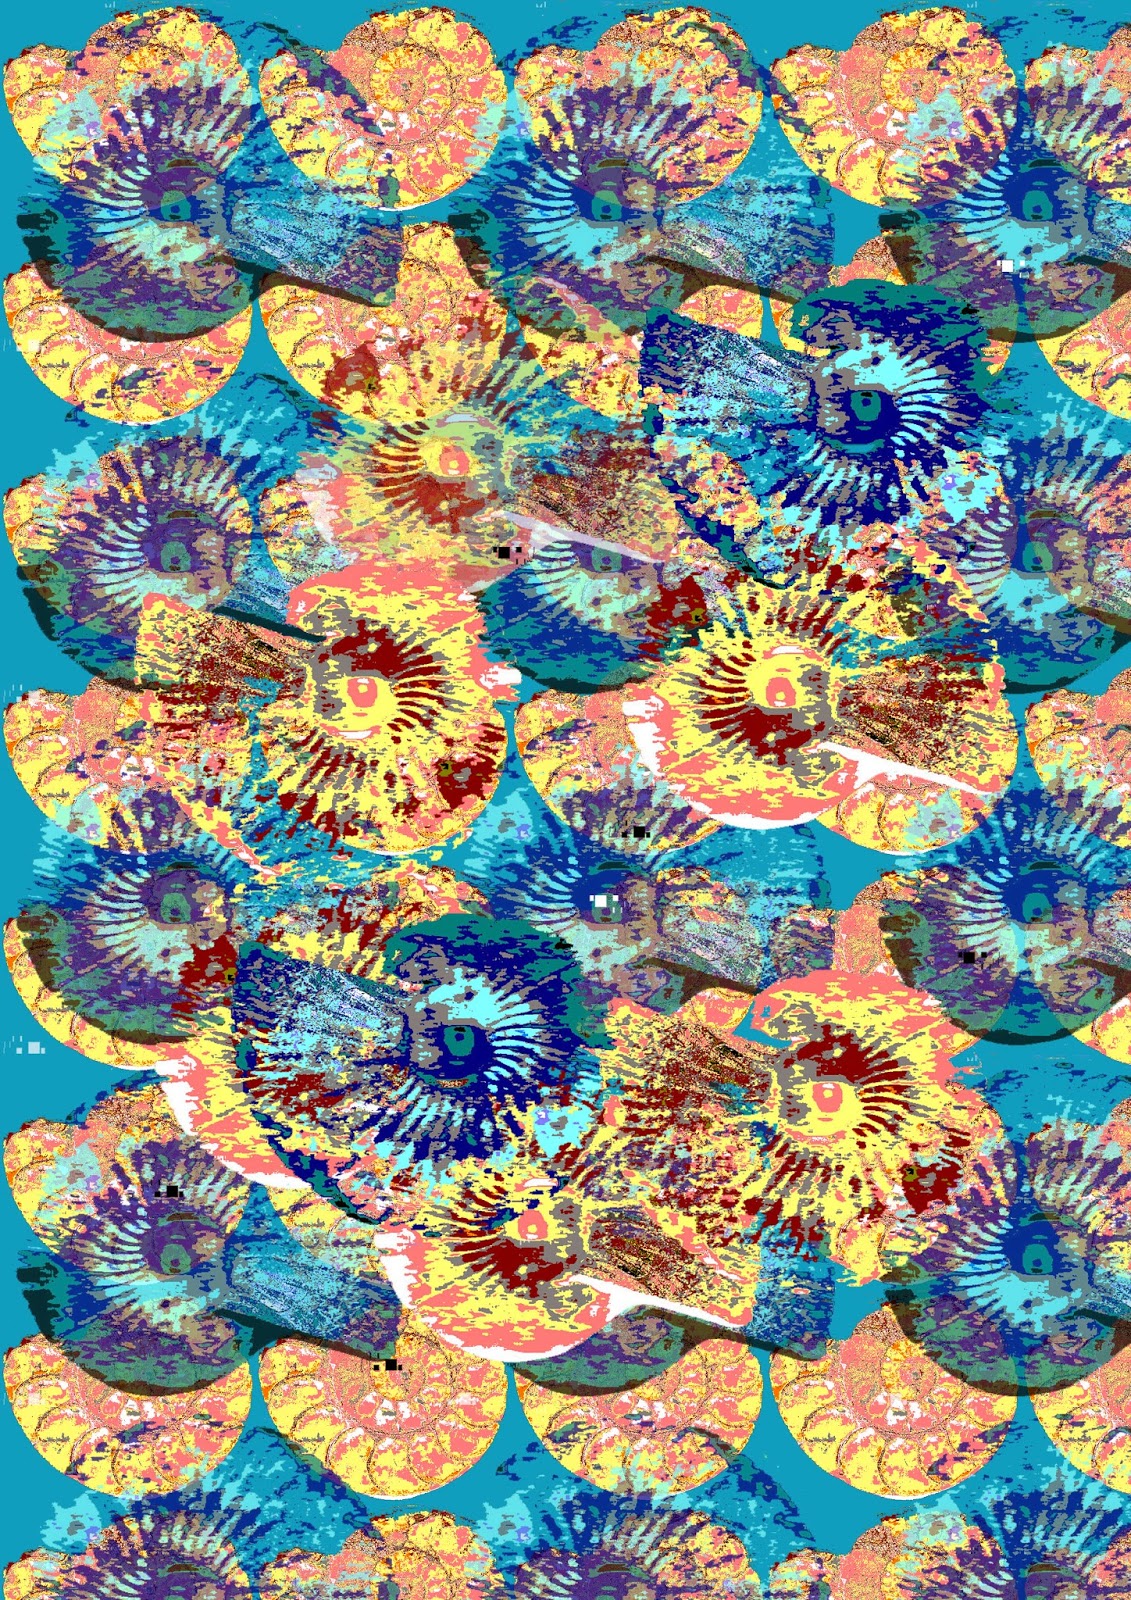
3.9.11  The original photo coloured in various ways, with the background erased to clear, flipped horizontally and vertically and applied in layers to make a busy pattern.  I'm surprised how much like flowers this looks.

3.9.12   Following a link in a magazine, I tried free photo editing by Pixlr.  It has a fascinating filter "kaleidoscope" which made a very interesting image.  I'll play with it some more when I've time.
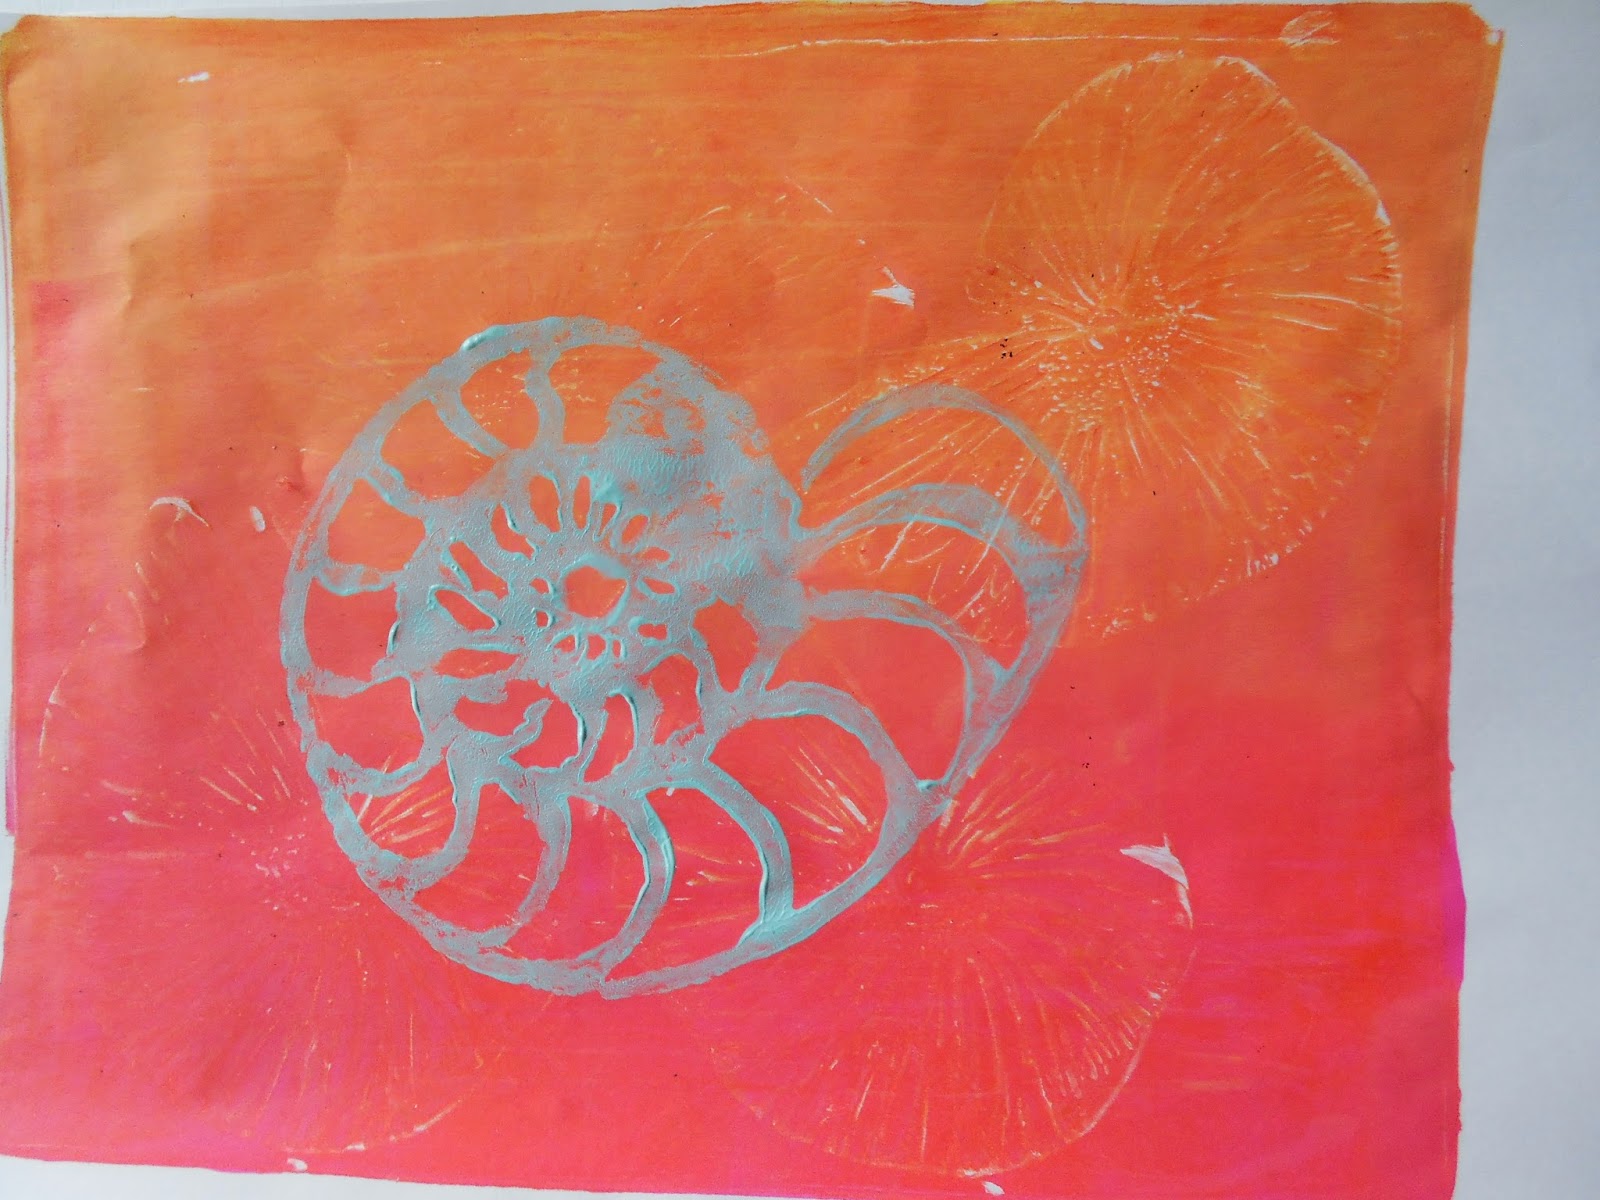
I used a print of the distressed outside of the ammonite to make a print block.  I used a piece of easy-cut polymer block.  I drew the ammonite freehand first with a soft pencil then marked with a permanent black marker the areas to keep.  I then cut away the rest with lino cutting tools, checking as I went along by doing a rubbing on thin paper using a graphite stick.  
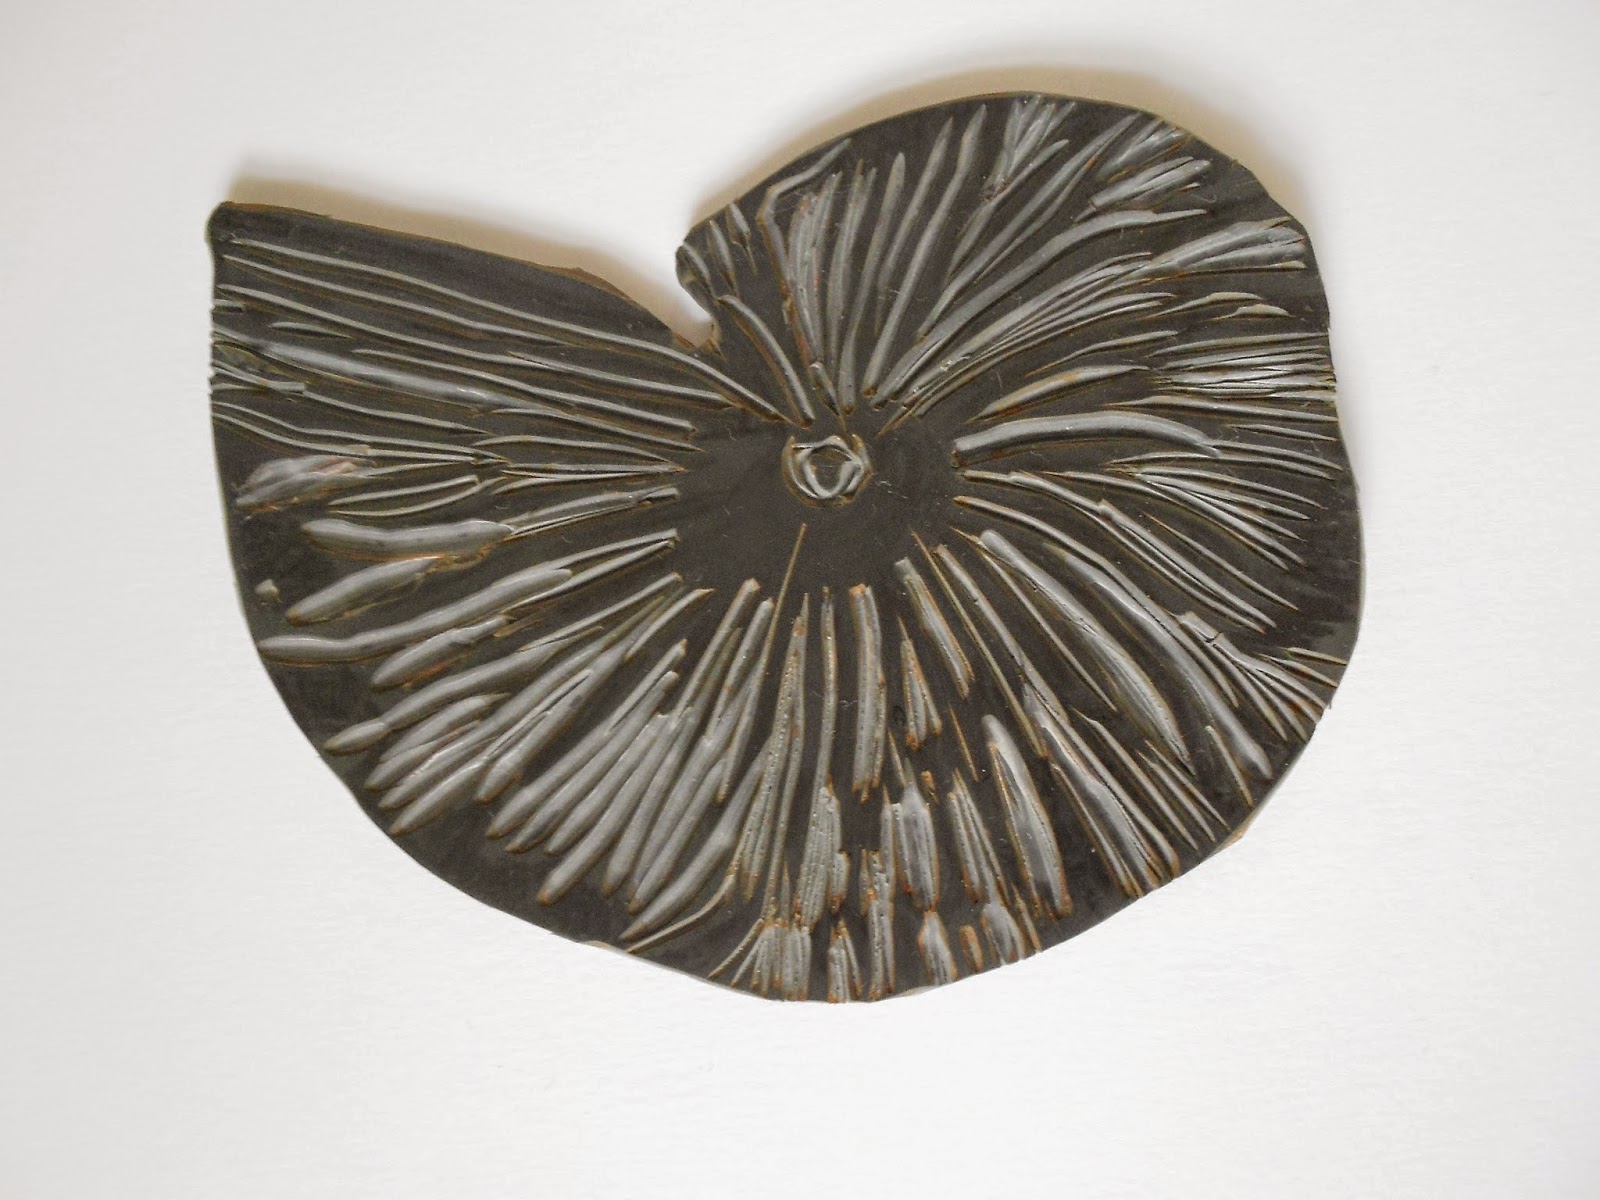
3.9.13 print block

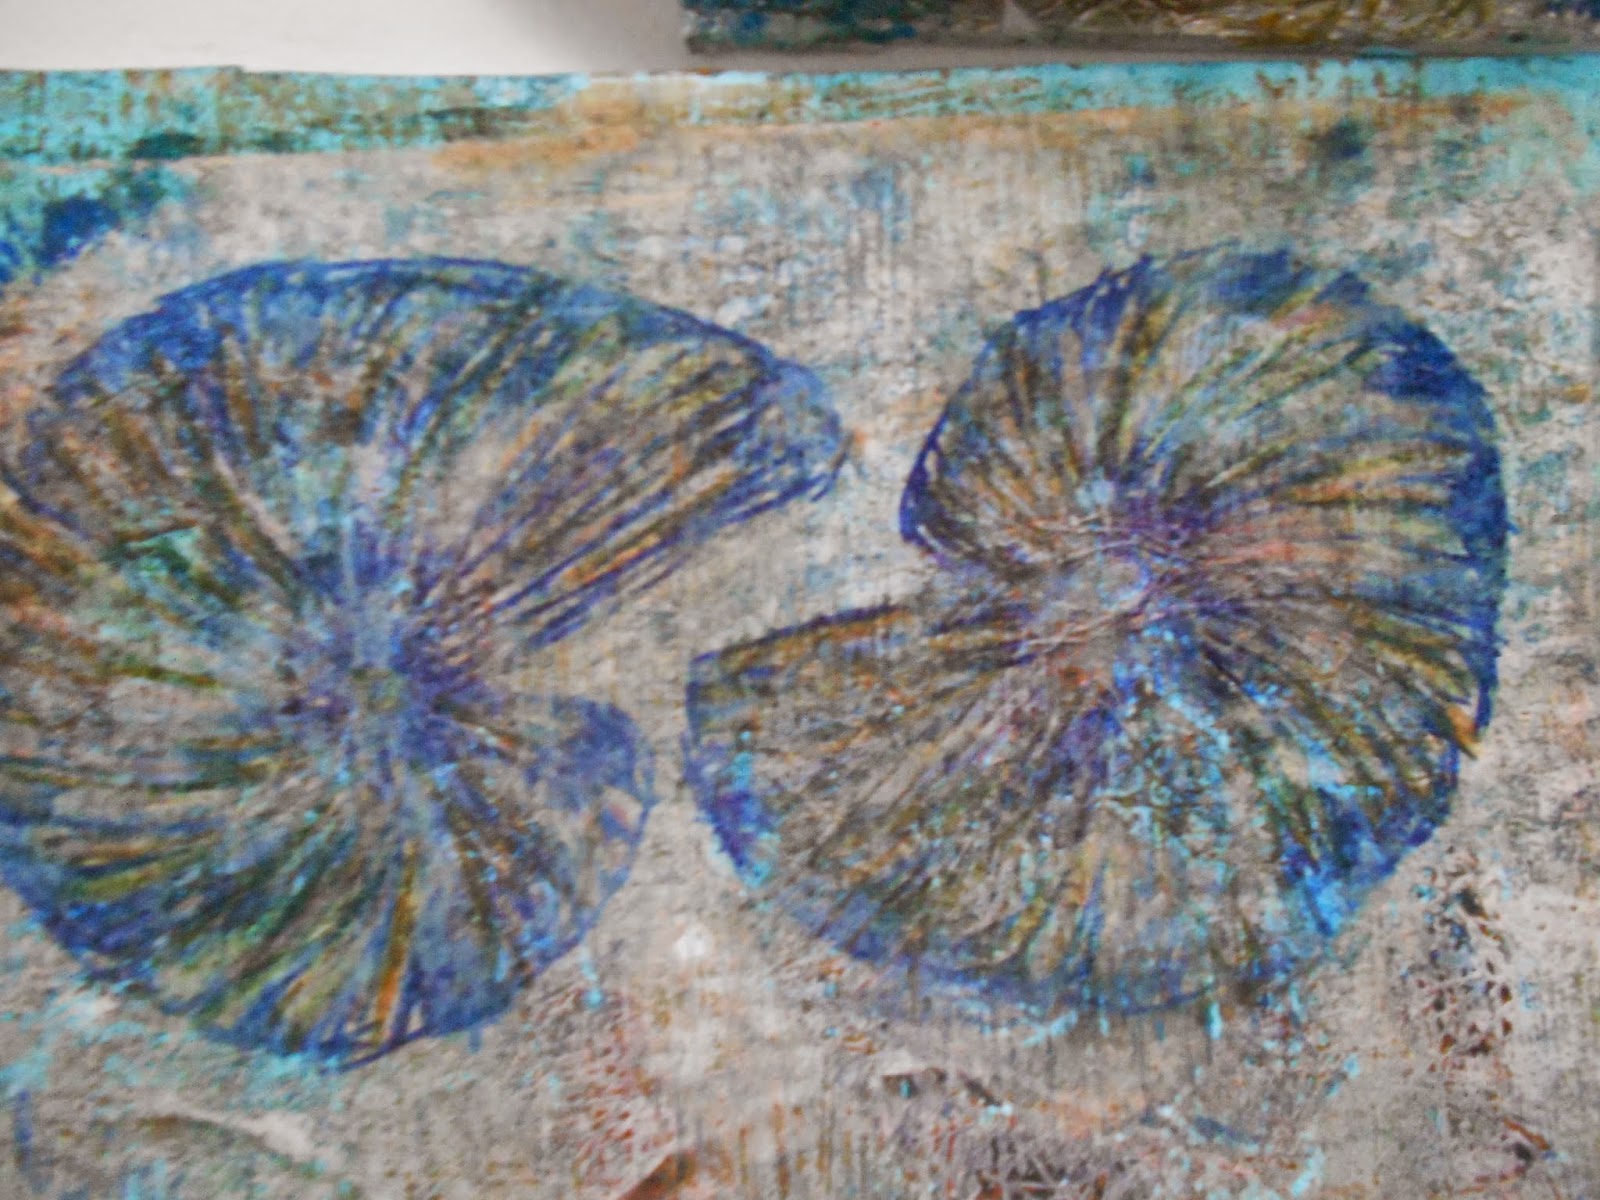
Once cut, I tried printing with the block, both positive images, printing directly from the block and negative images, by using the block to remove paint from a Gelli-plate.

3.9.14  Negative image with print block used to remove paint from Gelli plate

 
3.9.15 Positive image, printing directly from the print block
I was using some pale pastel colours and I found some of the prints a bit pale and indistinct and so I tried working into them with watercolour pens and coloured pencils to enhance the image.

3.9.16
I then did several line drawings of the inside of the ammonite, "learning my lines".  I finally did my best drawing in a fine drawing pen. 

3.9.21 (Sorry, numbers out of order, but haven't time to re-caption all of them.)


 I made several photocopies so I could work on it in the future.  I used that drawing to trace onto some Fab Foam to make a print block.  It was quite hard to cut out the little pieces.  I had some card ready as a base and, as I cut out each piece, I stuck it onto the card so I could have both negative and positive images to print from.  

3.9.17 The print blocks, rather interesting in their own right, so I didn't clean off the paint.

3.9.18 A positive print (on top of a faint print which didn't really work but makes an interesting faint background)

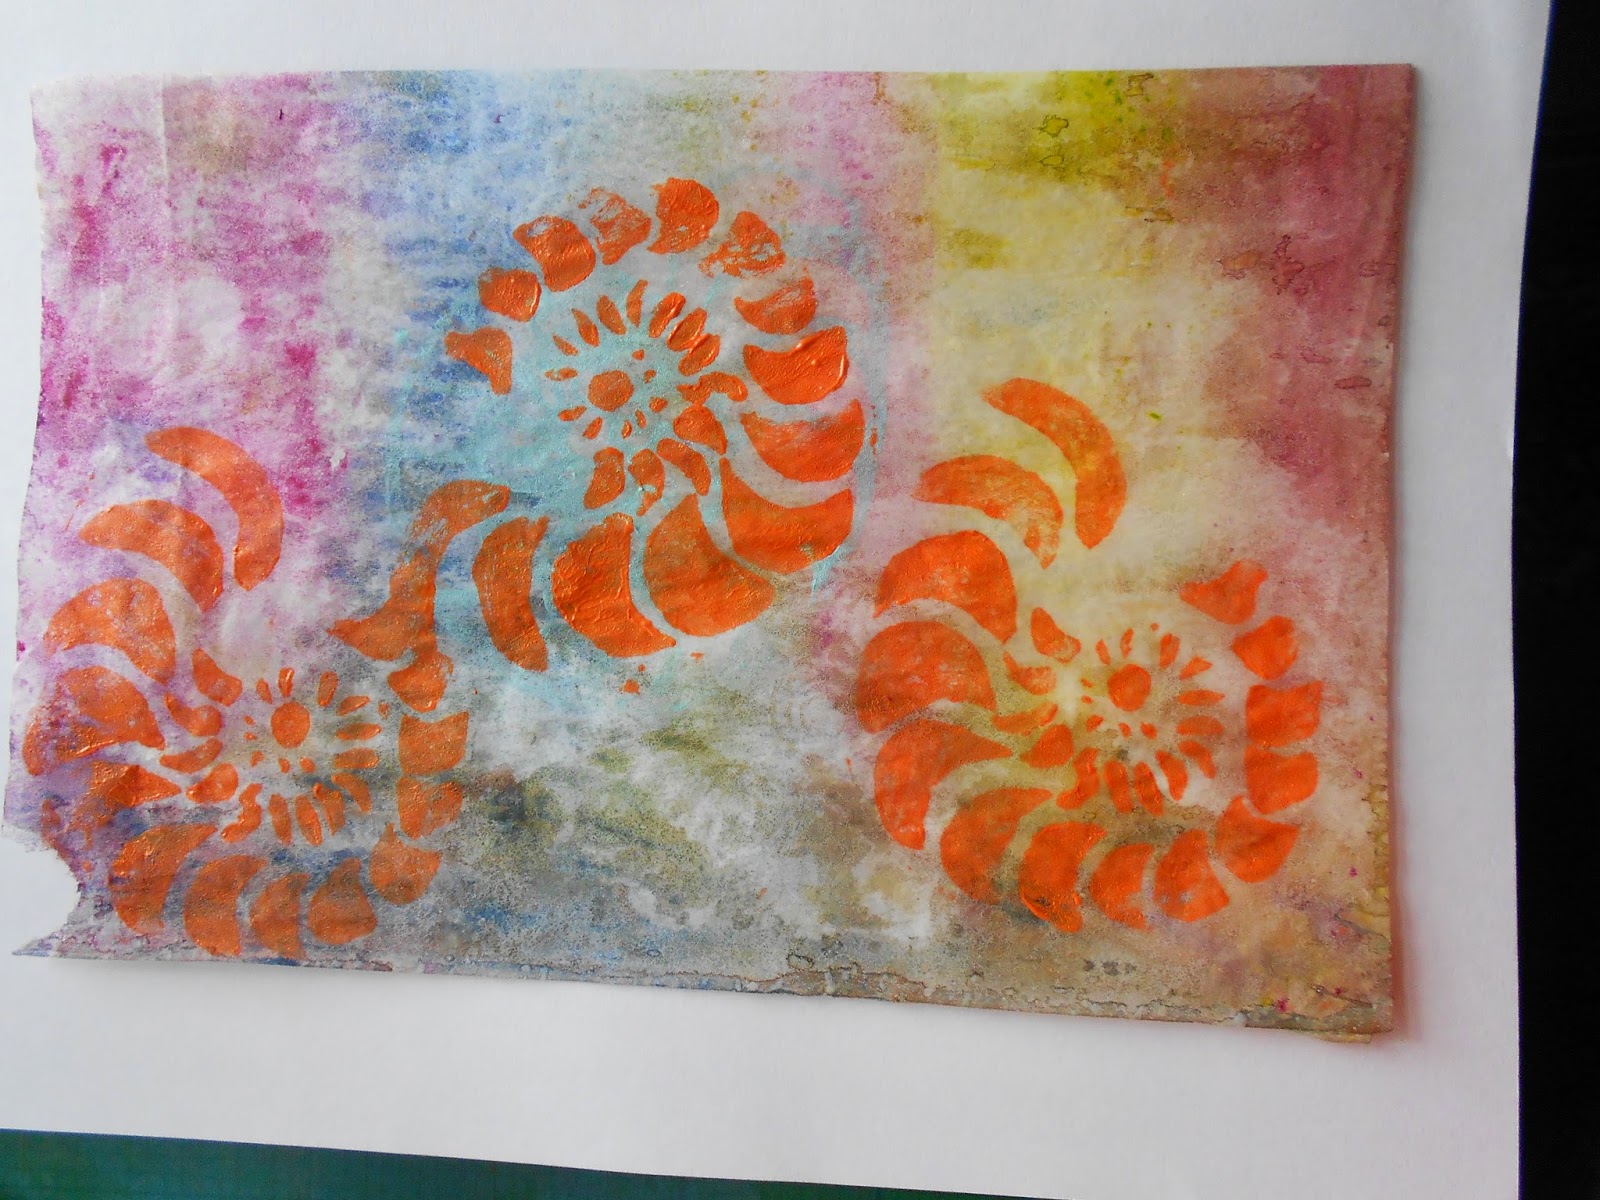
3.9.19  A print of the negative spaces.  (The background is the paper left over from some painted Bondaweb.)

3.9.20  Yet another attempt to make this dull print interesting.  Maybe I need to cut it up and re-assemble it!

Finally, I cut some windows in thin card to use to isolate parts of my drawing.  I found that the two shapes that worked best were a circle and the shape obtained by drawing around the ammonite.

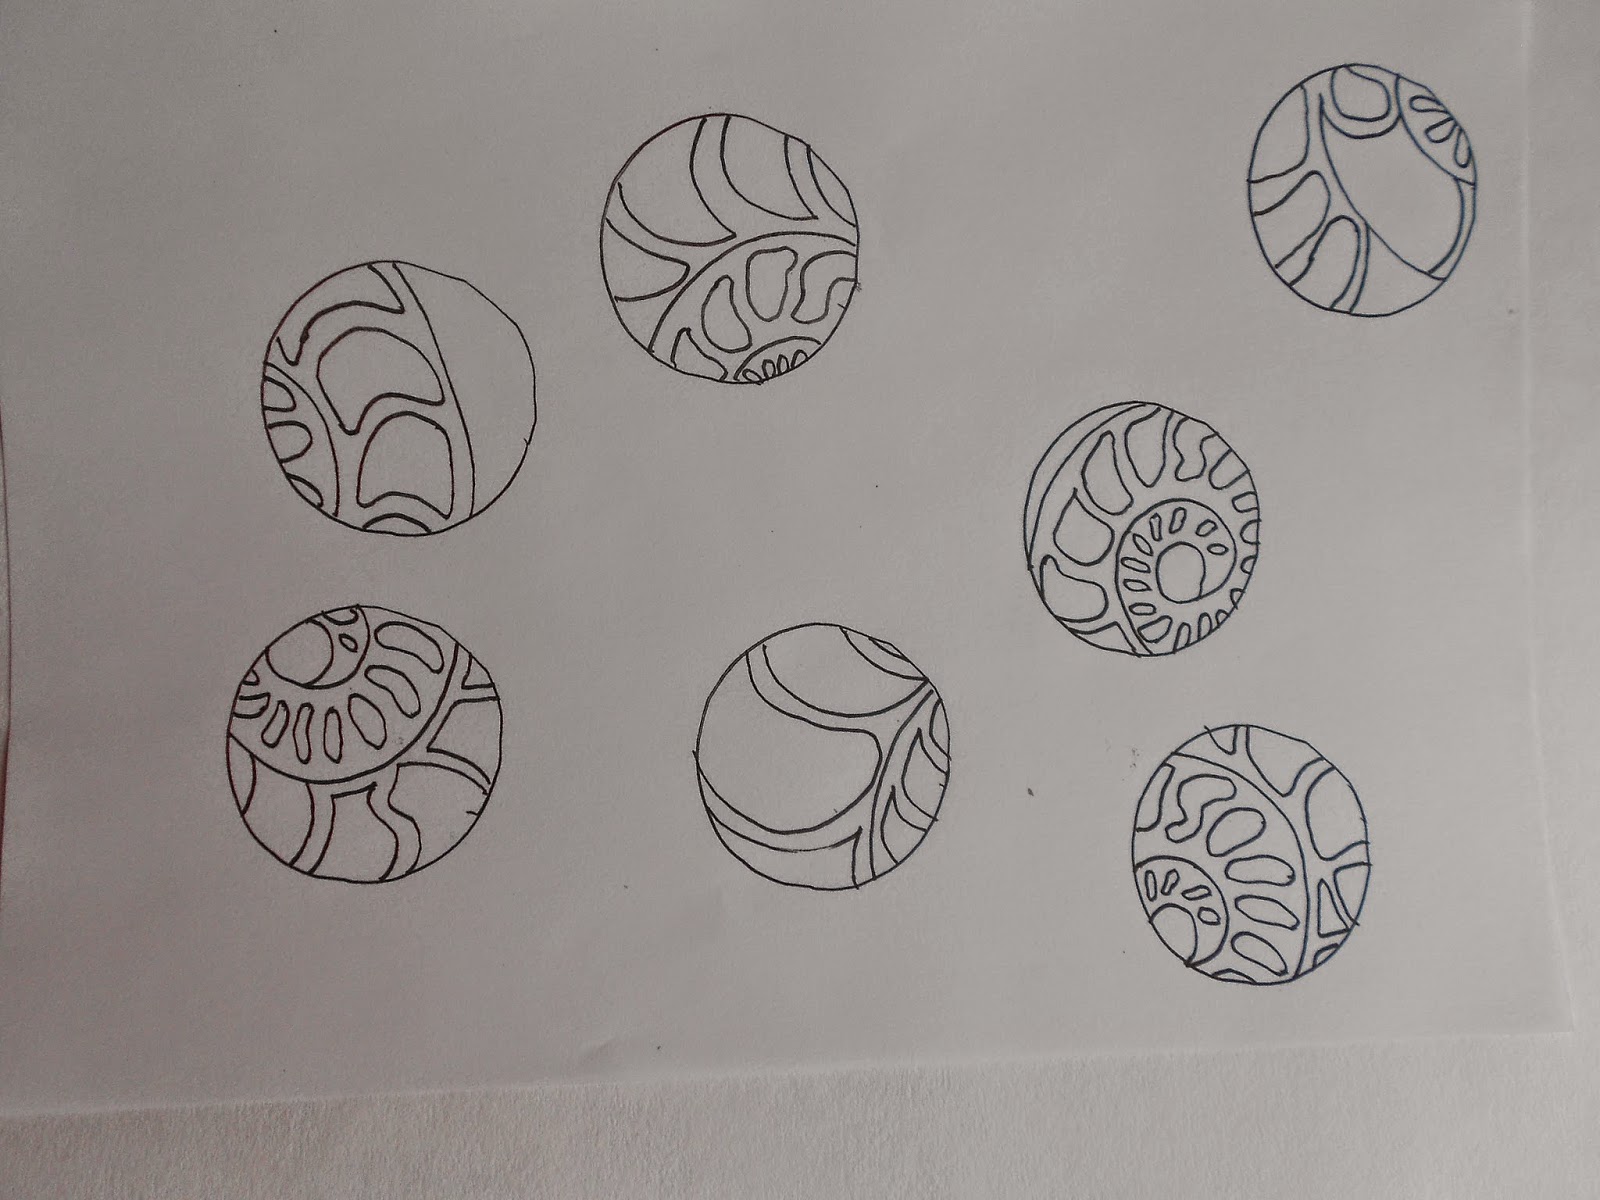
3.9.22  Circular compositions

3.9.23  Coloured in

3.9.24  Ammonite-shaped compositions - they look like little paisley motifs.

3.9.25  "Paisley Patterns" coloured in.

I have been completely in heaven these few days working on the first part of this chapter.  I am really in my element here.  I have  enjoyed experimenting and going off in lots of different directions to give myself plenty of material to work with.  I now have to take time to reflect, narrow down my choices and be selective in which images I choose to continue with my resolved sample.


Tuesday, 5 August 2014

Certificate Module 3, chapter 8 beads


This has been a most enjoyable chapter to work on.  I had never much fancied beadwork and so had never tried it and it was a very pleasant surprise to discover how pleasing it was to sit peacefully stitching away and enjoying the effects.


(Note: I’m sometimes confused by other blogs, but here the caption is below each picture.)


DSCN6559 

3.8.1 The completed bead sampler


I’ve taken close-up pictures of the various areas, which I’ll post in the order of the suggestions in the instructions.


DSCN6605

3.8.2 a compact area of one type of bead sewn on randomly


DSCN6566

3.8.3 a compact areas using more than one type of bead


D lightly sprinkled random more than one type of bead

3.8.4 as above but lightly sprinkled


E one kind of bead formed into lines

3.8.5 forming beads into lines


I pattern formed by more than one type of bead

3.8.6 forming lines with more than one type of bead  (I used sequins with a small bead in the centre alternated with the little plastic things you buy from hardware stores for securing wiring to a skirting board.)


G forming a pattern with one type of bead

3.8.7 forming a pattern with one type of bead


H forming a pattern with more than one type of bead

3.8.8a forming a pattern with more than one type of bead


J forming a pattern with more than one type of bead 2 3D spiral

3.8.8b forming a pattern with more than one type of bead


K Threading multiples onto one long stitch

3.8.9 threading multiples onto one long stitch


N beads trapped beneath fabric 1

3.8.10a trapping beads beneath fabric


O beads trapped beneath fabric 2

3.8.10b trapping beads beneath fabric


P beads trapped with stitching 1

3.8.11a beads trapped by stitches (washers secured by buttonhole stitch with small beads added around the edge


Q beads trapped with stitching 2 shisha

3.8.11b traditional shisha – an Indian technique of securing mirrored glass using a special shisha stitch.  Real shisha glass is hard to find now.  It is made from hand blown glass, silvered and then cut into pieces by hand.  (These are the last 3 pieces that I have left after buying some at an Indian embroidery class I went to several decades ago.  I was really surprised at being able to find them after so long!  Maybe I’m not so untidy as I thought!!)


R decorative stitching on top of a line of beads

3.8.12 a line of beads with a decorative stitch on top  (This is out of sequence.  It should be earlier, but Windows Live Writer is behaving itself today and I don’t want to risk spoiling it by changing things!!


S beads as edging bottom fringe

3.8.13a beads as edging – bottom edge


T beads as edging left hand edge

3.8.13b beads as edging – left hand edge


U  beads as edging right hand edge

3.8.13c beads as edging – right hand edge


V beads as edging top edge

3.8.13d beads as edging – top edge

Sunday, 2 March 2014

Module 3 Chapter 7 Dorset Buttons

I didn't expect to like this part of the chapter.  I thought it would be too difficult and fiddly, but to my surprise I really loved it and found Dorset buttons totally addictive!

First of all, here's my collection of rings which I chose to use.

3.7.12 a variety of rings including bangles and an old embroidery inner hoop which somehow had lost its outside.

I obtained the small brass rings on the internet from Henry's Buttons in Dorset, along with an interesting and informative booklet for £6 which told a little of the history of the craft along with very clear instructions.

3.7.13 Instruction booklet

3.7.14  My Dorset buttons details below
a.  My first attempt.  On reflection, a larger ring might have made it easier for a first try.  It's not very even, but reasonably close to how it should look.

b.  Second attempt.  I tried changing the colour for the rounding and I like the effect.

c.  I used the bigger (32mm) ring and made 10 spokes.  I then tried needleweaving on pairs of spokes.

d.  A repeat of b.

e.  I used a variegated thread for the casting and laying and used it and a plain yellow for the rounding.

f.  I used a traditional technique on a 32mm ring, but used paper thread.  I like the roughness of this.

g.  This is the honeycomb crosswheel variation from Marion Howitt's booklet detailed above.  It gives a spiral in the centre - an unexpected and happy result.

h. This uses the same technique as f, but with a thicker variegated knitting yarn.

i.  This is my second attempt at a bird's eye button.  These were made without metal rings, making them soft enough for babies' garments.  The yarn is wound 14 times around a knitting needle and then blanket stitch is used all the way round.  I used a shiny rayon thread.

j.  This was my first attempt at a bird's eye button.  The wool was too fuzzy to be able to see the hole and the stitches clearly, and I used too thin a knitting needle.  The second attempt worked much better.

I then had a bit of fun changing the scale and materials used and trying a related technique of using crochet to cover a ring.

3.7.15  Having fun - details below

k.  A 50mm plastic ring covered with three rounds of crochet using a variegated knitting yarn.  The first found used double crochet to cover the ring, the second round consisted of one double crochet stitch worked into each stitch of the previous round and the third round produced a narrow frill by working two double crochet stitches into each stitch of the previous round.  I filled the hole in the middle with e. from the previous illustration.

l.  Simply double crochet worked all around a 32mm ring using a mohair thread.  I filled the hole in the middle with a 20mm ring that I had covered with strips of Tyvek and then wrapped with metallic thread before ironing between two sheets of baking parchment.

m.  A thin bangle from a charity shop cast and laid with dishcloth cotton.  The honeycomb pattern rounding is done with strips of dyed interfacing (it happened to be iron-on interfacing and I like the subtle pattern of dots from the adhesive.

3.7.16 A detail of the Tyvek button as described in l. above

3.7.17  My biggest button, made from an embroidery hoop

I had fun with this last button.  I wrapped the hoop with strips of dyed felt and made the spokes from garden string.  I then used the traditional method of roundingusing (from the centre outwards) strips of dyed muslin, metallic polyester chiffon, a wipe-clean disposable tablecloth (charity shop find - I hoped it was Tyvek, but it isn't) and strips of old navy blue opaque tights.  In view of my experiences today at Accident and Emergency I couldn't resist adding assorted items from my first aid kit so there is also some crepe bandage, strips of Elastoplast and little roses formed from tubular finger bandages(!)