Module 5 "Touching Texture"

Module 5: "Touching Texture"

A study based on textured surfaces in landscape.

Saturday, 30 June 2012

Certificate Module 2 Chapter 9

Fibonnacci Sequence

I enjoyed doing these exercises - ideal for a busy time caring for poorly elderly relatives and entertaining a friend from California for a few weeks.  I found that they could individually be fitted into a few minutes at the beginning or the end of the day, when I could snatch some time to myself.  The combination of exact mathematics with design was an intriguing one and reminded me how much I used to enjoy geometry at school.  (Yes, it made me a bit of a freak and unfortunately the liking didn't last once maths got too difficult!)

 A word of explanation as to my numbering:  The first number (in this case 2) refers to the module, the second number (9) refers to the chapter, F is for the Fibonnacci exercises and G is for the Golden Section exercises.  The third number is the number of the exercises.  This number corresponds to the number of the illustration in the instruction manual.


2.9.F1


2.9.F2


2.9. F3
I love how 2.9.F3 looks.  It somehow reminds me of a landscape with grassy areas and water seen through trees.

2.9.F4
2.9.F5
2.9.F6
2.9.F7(1)  strips cut according to Fibonnacci sequence


2.9.F7( 2 )exercise copied 4 times and pasted to make a symmetrical pattern

2.9.F8 - F7(2) cut into equal strips and alternate strips slipped down
2.9.F9 - F7(2) strips arranged in log cabin pattern
2.9.F10
Exercise F10 was formed by cutting F7(2) into diagonal strips and rearranging them.  I like how this seems to have an oriental look.  It makes me think of pagodas.

2.9.F11
In F11 the diagonal strips of F7(2) are arranged in a log cabin design.  This design made me think somewhat of a fish and I couldn't resist using Photoshop to make it more so.

2.9.F11 variation just for fun!
Sorry about the variation in tone in the illustrations: some were photographed (too big for my scanner) and some were scanned.

The Golden Section

I started, as suggested in the manual, by drawing the squares out on squared paper.

2.9.G1

2.9.G2 the squares cut out of patterned paper and arranged in a similar way to G1

2.9.G3 the rectangles treated in a similar way
I found it very interesting that when the squares were arranged as above, they formed a rectangle and when the rectanges were so arranged, they formed a square.

2.9.G4
In G4, I traced the spiral formed by the diagonal lines onto tracing paper, then constructed the square on each diagonal and cut it out of the patterned paper, before sticking it down along the diagonal line, so that the whole arrangement forms a spiral. 


Wednesday, 6 June 2012

City and Guilds Certificate Module 2 Chapter 8

"Not What It Seams"

In this chapter we were continuing with piecing our patterned fabrics, but finding ways of making the seams more interesting.

I started by making a Seminole sample, cutting some strips diagonally and others straight across.  This gave a series of wavy lines crossing the piece.  A spotted fabric for one line produced the "wiggly lines and circles" that I found interesting in my original drawing from animal markings.  To make the seams more interesting, I lapped the seams and then frayed them to make fringes.  I liked how this gave a smooth but still raggedy look.  See sample 2.8S.1.


2.8S.1
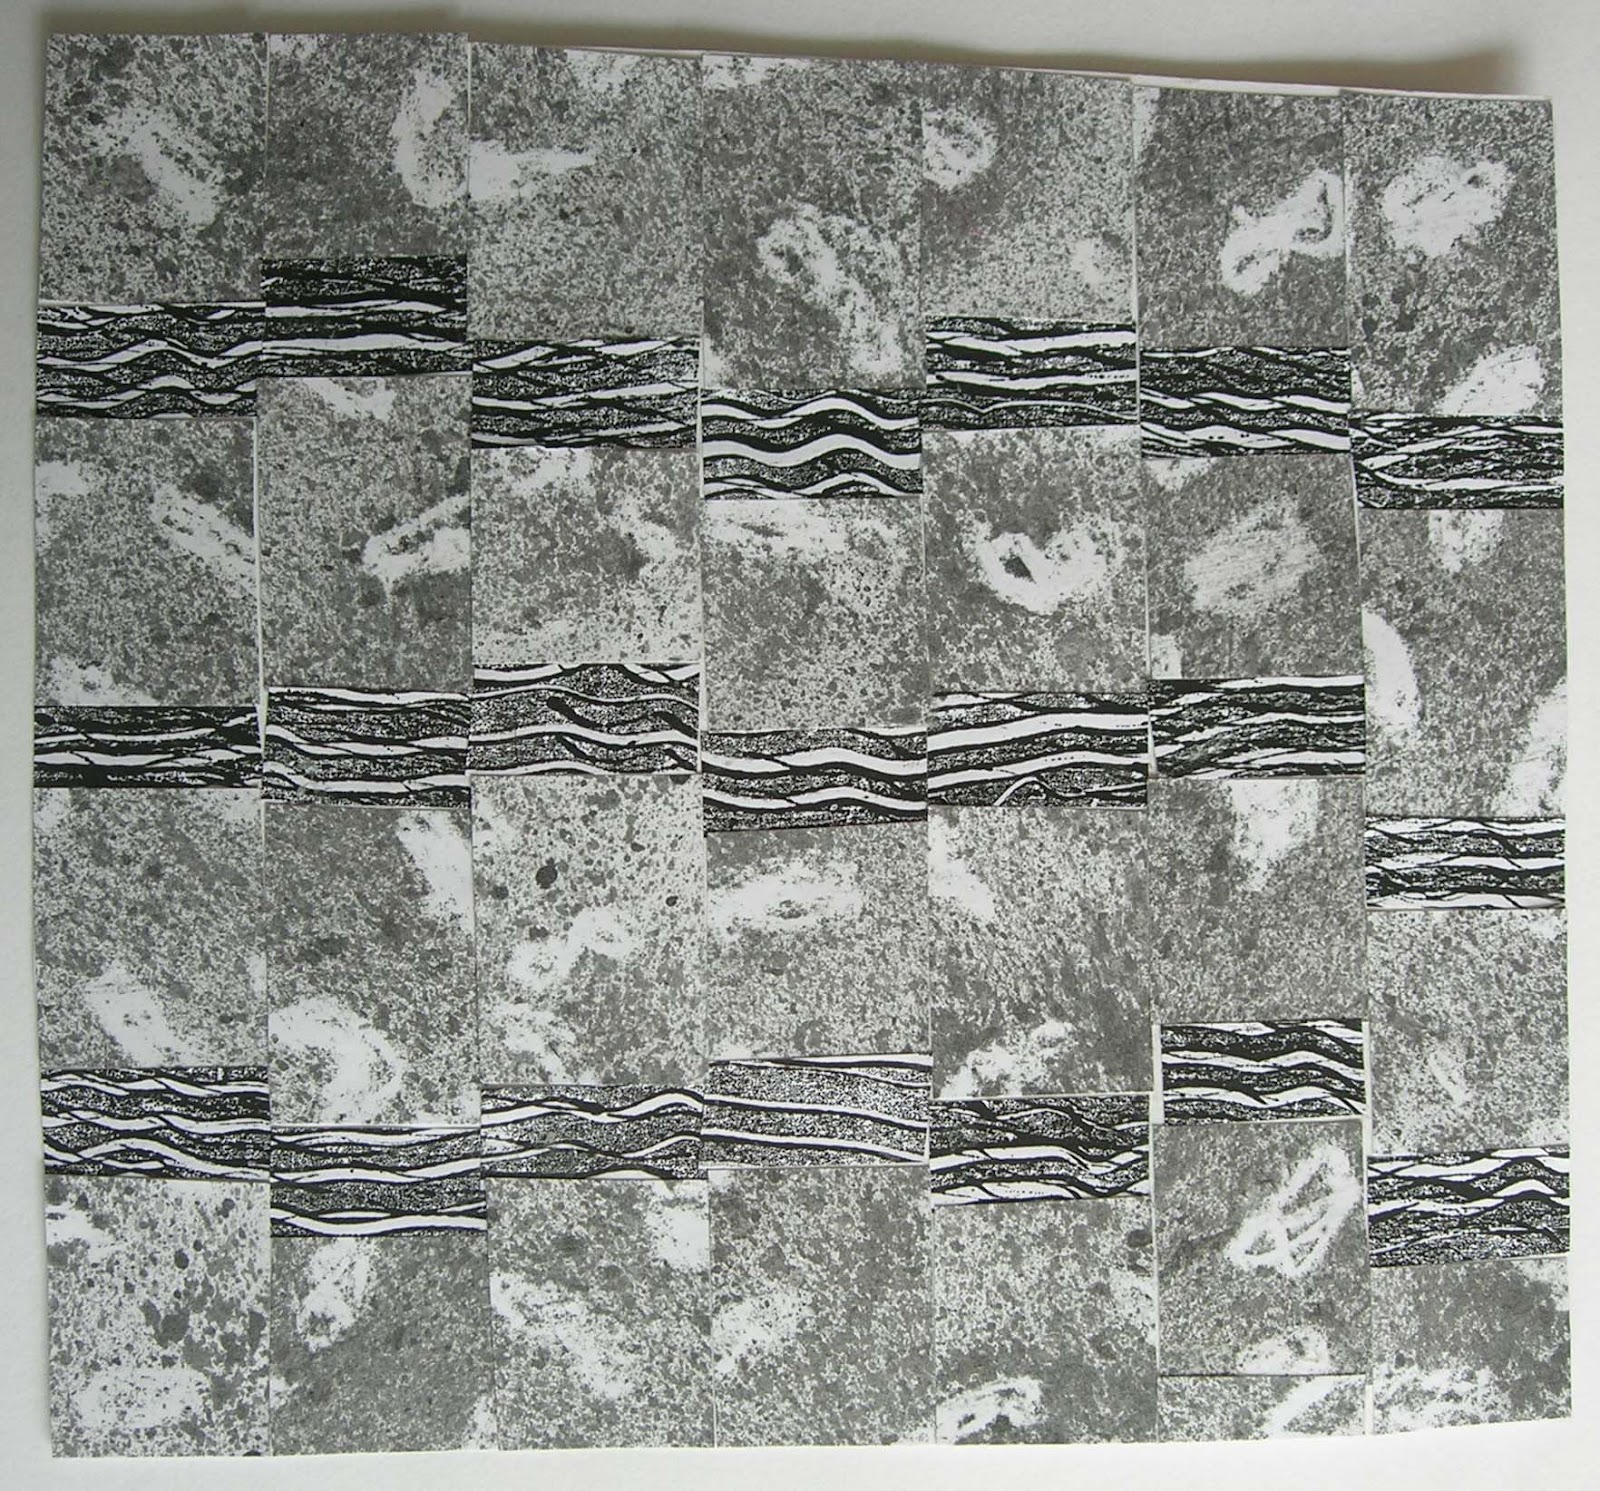
 Next I had fun making a sample with every different effect I could think of.  See sample 2.8S.2.


2.8S.2
Below are some details of sample 2.8S.2.  The top seam is a channel seam in which the seam is open to show a contrast fabric below (I found the instructions in an old sewing book).  I caught the loose edges back with a stitch or two every 6cm or so and stitched the loose edges together in between.  The contrast fabric underneath is one of my less succesful machine stitched strips from chapter 3.  See detail A.


Detail A of 2.8S.2
 The next seam was a plain one, but decorated by hand-stitching some French Knitting (or what we as children called "catty's tails") in a wiggly line.  See detail B.


Detail B of 2.8S.2

In the third seam, I trapped squares of patterned fabric by pinching the centre point and trapping it in the seam, giving a series of handkerchief points.  The fourth seam is lapped and fringed, stitched with a decorative stitch.  Seam 5 is a French seam, padded with wool and tied at regular intervals with narrow black ribbon.  Seam 6 is a normal seam, but decorated with metal washers hand stitched at the edge.  All of these can be seen in detail C.


Detail C of 2.8S.2

For the seventh seam, I folded squares of fabric in two with the crease at the top, folded down each top corner to the bottom centre and pressed them, before trapping them in the seam to give triangular points.  See detail D.

Detail D of 2.8S.2

Finally, I trapped knotted narrow strips of fabric in the seam.  See detail E.

Detail E of 2.8S.2
Trimmings

We were asked to make some simple ideas we could use to trim our functional 3D item (which we'll be making in a later chapter).  These were ribbons, cords and toggles.

Ribbons

The first ribbon I made was a pieces strip left over from some Seminole work.  I tried various machine stitches, varying the length of the stitch to give different intensities of stitch.

2.8R.1
However, I found this a bit boring so decided to try to embellish it.  I cut some fabric squares and ran a gathering stitch up the centre.  When gathered, they gave bow tie shapes which I then stitched onto the strip at intervals.  Finally, a variety of black and white buttons to decorate each bow tie.  See 2.8R.2.

2.8R.2
Next, I tried laying several strips of varying widths on top of each other.  Again, trying to interpret my wiggly lines and circles, I chose fabrics with patterns of wiggly lines and added wiggly stitch on top.  Buttons and washers hand-stitched on gave the circles.  See 2.8R.3.

2.8R.3
I had been left with lots of scraps and strips of fabrics, so I knotted some of these together to make another ribbon.  I rather liked the raggedy quality of this.  See 2.8R.4.

2.8R.4
Cords


2.8C.1

From left to right, the techniques used are:

  1. a simple fabric strip, knotted at intervals
  2. a bunch of several fabric strips twisted together and knotted
  3. a single strip of fabric, twisted and machine zig-zagged to secure.  I used a bought spotted fabric for this and I liked how the occasional black spot shows through the stitching.
  4. three twisted fabric strips plaited with the ends knotted to secure
  5. a fabric strip twisted and then machine zig-zagged to secure
  6. three strips twisted and stitched as in 5 above, then plaited together
Toggles

2.8T.1
From left to right the techniques used are:
  1. a simple strip of fabric rolled up and stitched to secure.
  2. a strip of fabric folded and knotted
  3. three strips of different fabrics laid one on top of the other, folded and knotted
  4. a strip of fabric knotted four times one on top of the other
  5. a "monkey's fist knot" tied in an extra long strip of fabric
Finally, while chopping leeks, inspiration struck with an idea for a tassel.  See 2.8T2.


leeks


2.8T.2

I have really enjoyed this chapter - a little light relief - and look forward to using the various trimmings in my final 3D piece.

Thursday, 3 May 2012

"Virtual Seminole"

Taking refuge in my studio from the (endless) snooker on TV, I started playing around with Photoshop, cropping, copying and pasting my pictures of my monoprinted fabrics to make a patchwork block, which I then turned and cropped again, into several different strips.  I turned each alternate strip upside down and copied and pasted it all.  A very easy way of doing virtual patchwork (easier to do than to explain).  An enjoyable evening, livened by Scarlatti playing in the background.

Certificate Module 2 Chapter 7 PS

Sian wondered what the back of my log cabin pieces looked like, so here they are:

2.7.A8 reverse
2.7.A6 reverse
2.7.A7 reverse
Sian also suggested I might try chopping up one of the log cabin blocks to make a seminole design.  I sliced 2.7.A8 into diagonal strips then played about with the layout until I got something I liked.  I liked the fact that the shape changed from a square to a much more interesting one.  I also liked the chevron effect gained by turning alternate strips upside down.


2.7.C1

 This has given me a renewed interest in log cabin piecing - as long as I chop it into bits afterwards!! 

Saturday, 28 April 2012

Certificate Module 2 Chapter 7: A Little on Account Part 2

Traditional Piecing Methods

Second Stage - Fabric Samples

I don't know whether it was the mood I was in or the technique itself, but I found log cabin terribly tedious and boring to do.  I couldn't come up with anything interesting to do with it.  I did a few samples, but I don't really like them.  Patchwork is something I don't really like so I have struggled with this chapter.  I found my interest increase when I started on the Seminole work.  I loved the surprise element of it.  I haven't done many samples yet, but I'll carry on with this, incorporating the ideas of decorating seams from the next chapter.

A - Log Cabin
2.7.A6
2.7.A7
2.7.A8


B - Seminole

2.7.B6 "right" side


2.7.B6 the reverse side
2.7.B7 the "right" side

2.7.B7 the reverse side

 I found the Seminole work much more interesting.  In 2.7.B7 I was fascinated by how interesting the little bits of pattern were.  Seminole always gives a surprise when it is finished.  The reverse side of both samples gave me a taste of how much the next chapter could add to the interest with experimental seams.  Although I have had time for only two samples so far, my imagination has caught fire with all the ideas sparked off.  Some ideas I'd like to try are:-
  • Interpret the marks on the light coloured squares in 2.7.B7 in stitch instead of print
  • Try some samples with some seams going one way, some the other
  • Interpret my "squiggly lines with circles" from my original sea anemone drawing using seminole patchwork for the squiggly lines (as shown in 2.7.B5 and 2.7.B6) with stitch for the circles
  • Try combining seminole for the squiggly lines with yo-yo patchwork for the circles.
I found a book in my local library on Japanese Quilt Blocks.  It seems to go with the Shibori earlier.  It had a section on Sashiko, which would be great to use as inspiration for the stitching on fabrics to come in later chapters.  I'm starting to feel a definite Japanese theme starting here.

These ideas should keep me busy for a while.  Watch this space ...

Certificate Module 2 Chapter 7: A Little on Account

Traditional Piecing Methods

It's been so long since I did any work on City and Guilds that I thought, now I've got back in harness again, I'll post a little bit on account.

The last few months, in fact the whole winter, have been dominated by health issues, with multiple aging relatives needing help and support while they recovered from serious illnesses.  Meanwhile I was going down with every minor bug going.  However, spring is here (I know because the rain is slightly warmer!!) and I've got my energy and enthusiasm back again.

First Stage
Paper mock ups of traditional piecing methods
A - Log Cabin

2.7.A1

 
2.7.A2


2.7 A3

2.7.A4


2.7.A5


B - Seminole

2.7.B1

2.7.B2

2.7.B3

2.7.B4
2.7.B5


Blogger is playing up and I'm really struggling to get things placed how I want, so I'll post this now and put the fabric samples in another posting.