Module 5 "Touching Texture"

Module 5: "Touching Texture"

A study based on textured surfaces in landscape.

Thursday 29 September 2011

Module 2 Chapter 5: Patterned Papers

In this chapter we were asked to produce a series of patterned papers based on our drawings of animal markings.  Three different types of technique were used:
  • printing with a variety of media and objects
  • bleach on black paper
  • monoprints
Here are the results.  Each individual sheet is numbered at the bottom right hand side.

Printed papers


Bleached Papers


As before each individual page is numbered at the bottom right hand side.  The page at the bottom right hand side is a repeat of the left hand one, flipped horizontally, just to make the arrangement more symmetrical.  I didn't have any black tissue paper, so just tried it with black cartridge paper which I had.  Also I couldn't find any ordinary bleach locally and was too tired after a recent virus to make the 64 mile round trip into the city, so used a toilet cleaner containing bleach.  Surprisingly, it seemed to work fine!


Monoprinted Papers


I wasn't so happy with how the monoprints turned out. They look very pale and faded despite a bit of tinkering with the contrast in Photoshop!  I think maybe I was too sparing with the printing ink since I had very little left and was trying to make it last.  Still, when combined with the other papers, they might make a useful mid tone.

Sunday 25 September 2011

I'm back!

As you can see, I have started posting on this blog again.  Blogger have now restored the ability to zoom on an image by clicking on it, which I find essential.  I think they have had a lot of complaints when they changed it.  Anyway, it is easier for me to post on the blog provider which is linked to my fellow-students.

Module 2 Chapter 4: drawing patterns from animal markings

In this chapter we were asked to do linear pen drawings based on our research on animal markings.  These are self-explanatory.  Each image is numbered at the foot of the right hand page.

Friday 23 September 2011

Thanks for listening!

Thanks to Blogger for listening to its users and restoring the ability to zoom on images.  Very welcome!

Sunday 18 September 2011

I'm moving!

Hi everyone,

I'm so fed up of Blogger: awkward to use, very user unfriendly.  The new post editor helped a little, but it is still difficult and inconsistent to use.  And now they have changed things so that you can't zoom on an image.  That means it is useless for my purposes, so I've changed my blog provider.  Nothing new posted on it yet, hopefully in the next few days.  There is only a trial I did back in April when I was thinking of changing. 

My new blog address is

http://www.ceesew.wordpress.com.

See you there,
Catherine.

Monday 12 September 2011

Module 2 Chapter 3 Machine Stitched Columns Revisited

I had another go at stitching into the original boring machined strips, which I had previously printed and coloured.  I used black and white acrylic paint and printed from one of the strips onto another.  I stitched on top in black and white thread and then used an oil pastel to rub on top to highlight the relief of some of the stitches and give more variety of tone.  These strips were all influenced by fish scales and fins.
2.3.12sept.1


I then had another look at some animal photographs I had to get some fresh inspiration.  I rather liked a photo I had of a sea anemone.  I was really interested in the combination of wiggly lines and circles.

2.3.12sept.2


 I tried making a new column, with a combination of printing and stitch.  I varied the thickness of the lines by adjusting the stitch length and width and by use of whip stitch and couching.  The circles were printed on with black and white acrylic paint using a print block I made.  I was quite pleased with the results.

2.3.12sept.3
 I tried printing a digital photograph of the sea anemone column onto cotton fabric which I had treated with Bubblejet and ironed onto freezer paper.  I managed to fit in 3 copies, each of which I treated differently.
2.3.12sept.4
The column on the right was just stitched on top of the digital print. 
The "stitching" on the centre column was all virtual: rubbings from other textural stitched columns were made on tissue paper and glued on with matt acrylic medium.  Digital photos of stitched squares were printed onto organza, cut in strips and applied to the surface using Bondaweb.  A few more circles were cut out of black painted Bondaweb and ironed on.
The left hand column had rubbings on tissue paper glued on and then it was stitched on top.

Monday 5 September 2011

September Sketchbook: Post 2 - some detailed drawings

I'm really enjoying looking closely at a textile, in my case knitting.  Doing the detailed drawings of the structure of stocking stitch and garter stitch was a lot more fun than I expected, kind of a combination of doodling and colouring in.  It was just ideal for doing while convalescing from a nasty virus - lounging on the sofa, too weak (!) to do any housework or tackle machine embroidery for my course work in Module 2!


Page 6: stocking stitch right (smooth) side


Page 7: stocking stitch right side again


Page8: stocking stitch wrong (bumpy) side


Page 9: garter stitch
 One interesting thing I found was that the simpler stitch to knit, garter stitch (plain knitting on every row) actually has a more complicated and hard-to-draw structure than stocking stitch (one row plain knitting, one row purl alternated).

I became quite fascinated (am I turning into a geek?) with following the journey of the yarn in each row in the different stitches.  It fired off interesting concepts in my mind such as tortuous journeys, tracks and trails, intertwining and interlocking.  In the second part of the sketchbook, I look forward to exploring some of these ideas and also using the text of knitting patterns in some sort of imaginative way (if I can think of it!).

I'm no longer feeling guilty about stealing time from my Certificate coursework for the fun sketchbook projects since I am discovering that the one feeds off the other and gives ideas for techniques and approaches to try.

Friday 2 September 2011

Module 2 Chapter 3 Machined strips revisited

I had got bogged down with this chapter and was thoroughly dissatisfied with my machine embroidered strips of calico.  However, a one-to-one consultation with Sian filled me with new ideas, as did Jan Evan's wonderful summer school and the enjoyable and fun summer sketchbook project.  So I am now all fired up with enthusiasm.  Today I made a start for the first time since June.  I haven't got far, but just being able to post a few bits of work increases my confidence that I am back on track with my course work.

First of all, I taped one of my boring machined strips onto a drawing board and painted it with black and white acrylic paint.  I printed from it onto paper and onto the other boring strips as well as some plain calico strips.
2.3R.1 machined strip painted ready to print


2.3R.2 print on paper from machined strip


2.3R.3 print on machined strips from another machined strip
They are already looking more interesting, but I plan to stitch into them some more.

Now into my stride and in printing mode, I made two print blocks inspired by my drawings of animal markings.  I have printed one block of each in a small sketchbook along with the block.  I then used them to make graduated tones on another strip and on a large rectangle of fabric.  Following one of Sian's suggestions, I'll work on the whole rectangle with machine stitching and then cut it into strips.  I tried to graduate it diagonally so that each finished strip would be slightly different.


2.3R.4 first print block


2.3R.5 second print block


2.3R.6 stitched column then printed in black and white acrylic paint


2.3R.7 printed calico rectangle ready for stitching
From having found this chapter boring, I now am enthusiastic and looking forward to the challenge of using machine stitching on top of the printing to make shaded columns.

What an enjoyable day day: a lovely country walk with a group of friends this morning and sheer bliss this afternoon pottering around with paint and stitch, accompanied by Albinoni, Handel and a cup or two of Darjeeling - heaven! (It is so nice to be retired!)

September drawing project - first steps

I decided to study knitting for my textile study, since the structure has fascinated me for a long time.  I began by scanning and photographing some samples of knitting I had around the house.
I tried to examine the structure of each of the two stitches: garter stitch and stocking stitch.  However, my samples were too close in tension to see the whole structure and I could only draw the surface appearance of the stitch.

First I looked at garter stitch.  It appeared to me to look like a series of rows of crescent shapes, with alternate rows upside down.  After drawing garter stitch in pencil, I made a crescent shaped print block with Funky Foam and used it to print how the surface of the fabric looked.


Next I looked closely at stocking stitch.  I thought it looked like a series of columns of regular v-shapes.  I tried again to make a print block from Funky Foam, but the v-shapes were too fat, so I made a new block and tried again.


I remembered that I had a larger v-shaped print block left over from Module 1 work and so tried it to give a different scale of pattern.
The next thing I need to do is to knit some garter stitch and stocking stitch samples using a thin, smooth cord and large needles, so that the tension is much looser and I will be able to examine the structure of the knitting stitches.

(I had done all this work before I read Anita Bruce's wonderful article on "Knitting as Drawing" in the September issue of "Workshop on the Web".  See Anita Bruce's blog http://www.anitabruce.tumblr.com/ and her website http://www.anitabruce.co.uk/ to admire her wonderful work.  Honestly I did come up with my sketchbook idea independently!!)

(PS I haven't done all this work since Sian posted the details yesterday.  I must admit to starting a week ago, anticipating what was to come.)

Saturday 27 August 2011

Sketchbook Day 30: Stitch

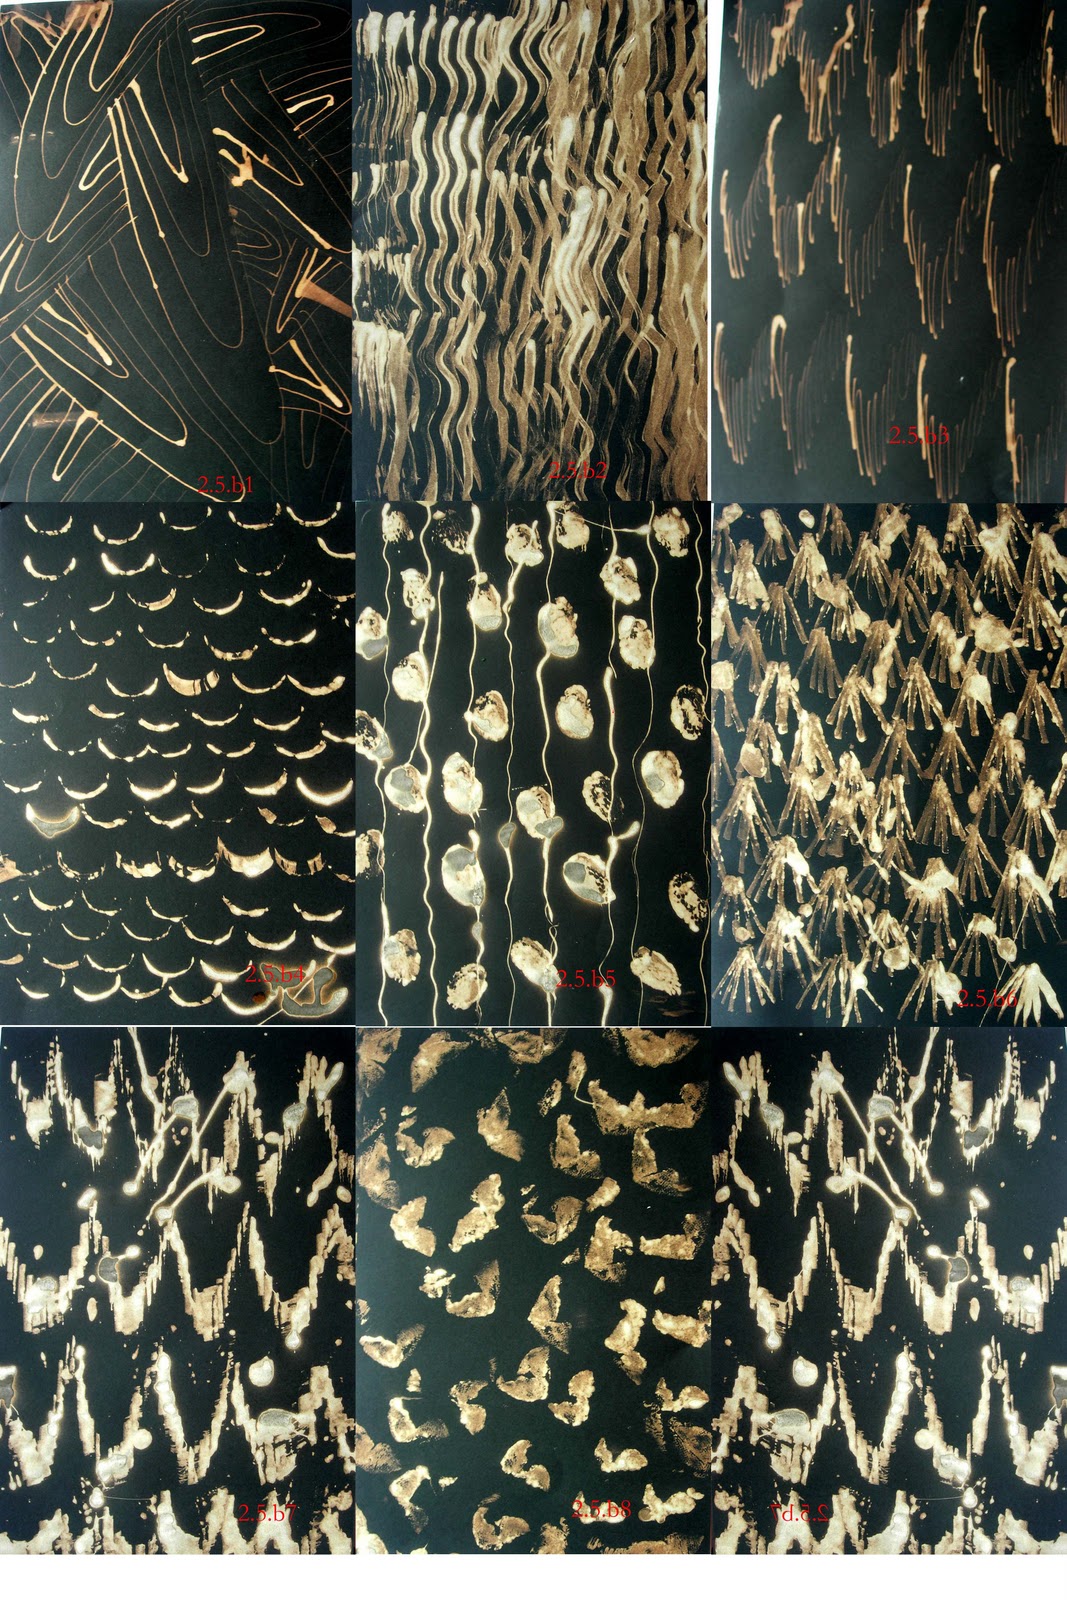
I was fascinated by Sian's results when she stitched into the paper and printed from it.  I couldn't wait to try it out for myself.  I continued with my big white daisies, since I "knew my lines" from drawing them before and was still interested in the shapes they made.
I made a simplified drawing of some of the flowers then pierced regular holes with a large needle and stitched with a cotton thread.  I quite liked how this looked without doing anything to it.
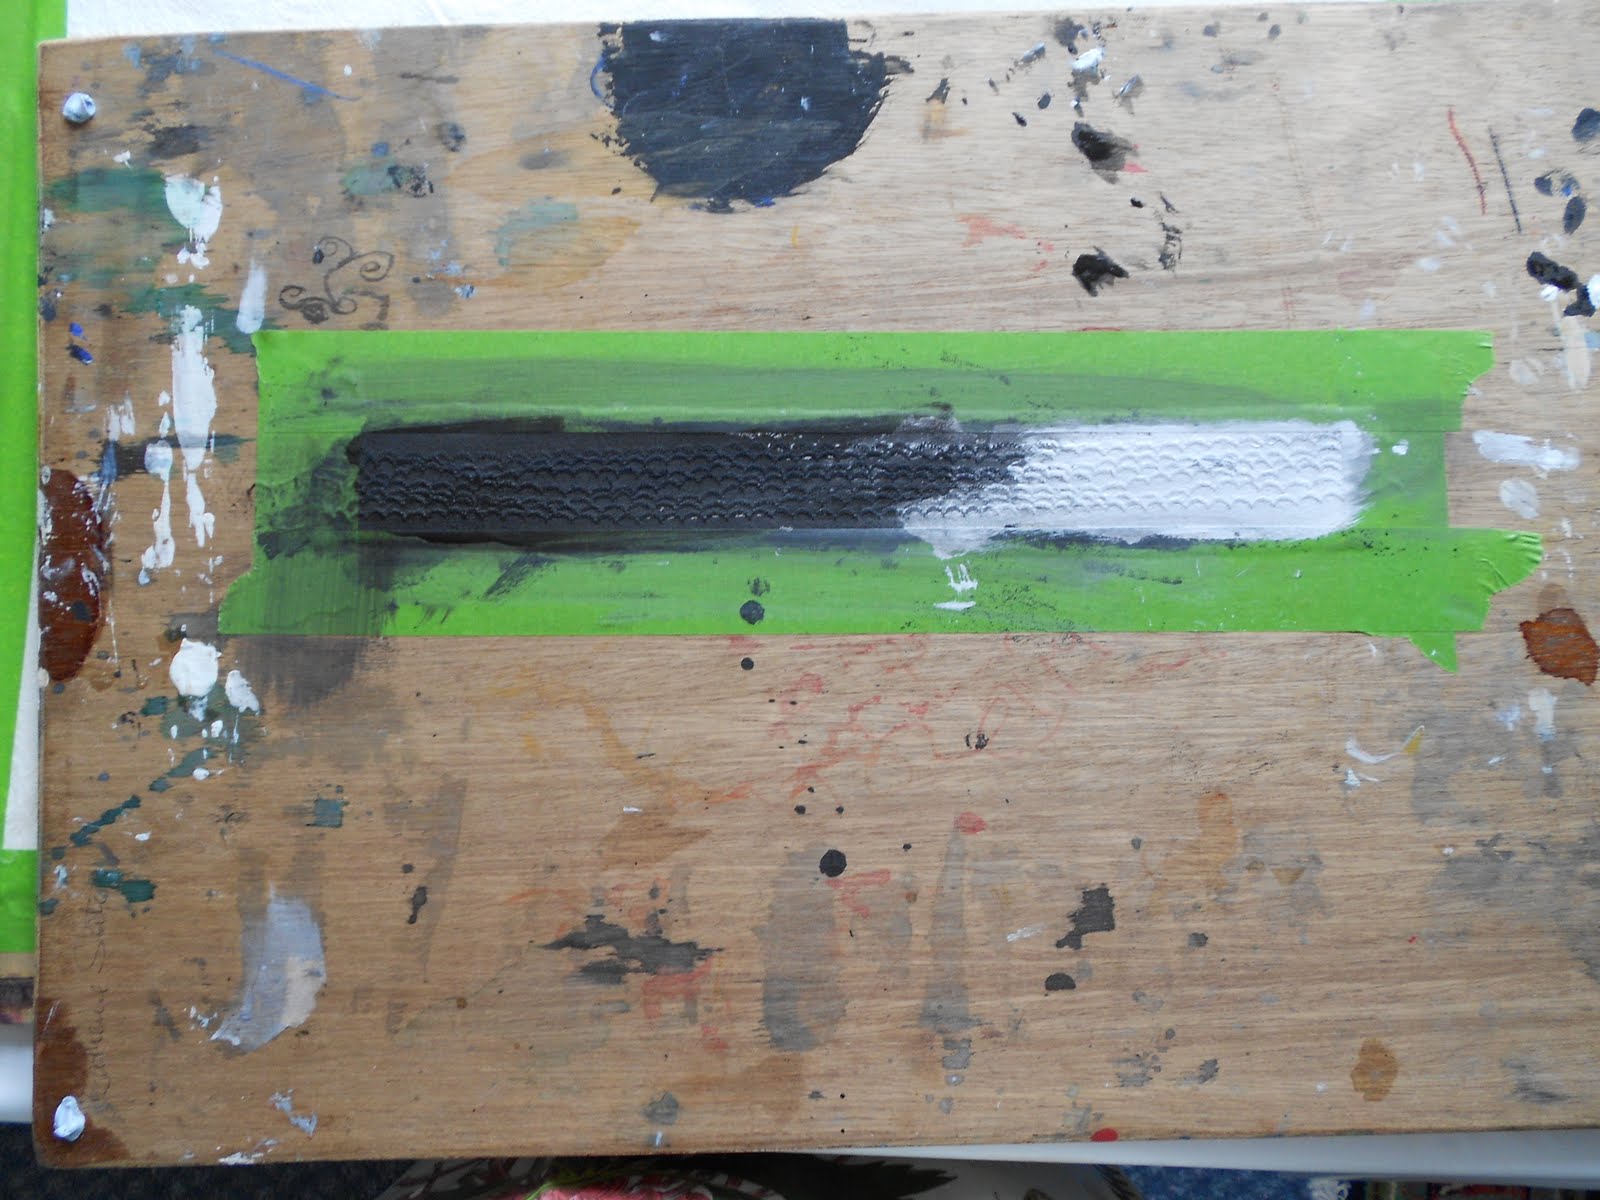
Next I tried to plan the print I would get from it.  I was particularly interested in the layers of colour and shape in my garden and tried to depict this.  First on the opposite page of my sketchbook, I painted a few daisy shapes with white gesso and stems with dark green acrylic paint.  I hoped that they would just be visible faintly in the background of the finished print.
Since I wanted the flower heads to be white, I then coloured the left hand page with various greens, using the Koh-i-Noor paintbox and putting some blue at the top for the sky.  Since the colours are transparent, I hoped the darker stems and white gesso would shine through.  Finally I painted the stems on the right hand page with green acrylic paint and the flower heads with white acrylic paint and closed the sketchbook firmly. 
I was quite pleased with how the print turned out.  While the paint was still wet, I printed it onto a piece of plain white paper.
It was interesting, but fairly indistinct.  However, when I then worked into it with some green Koh-i-Noor, the picture came to life in a most gratifying way.

I am interested in how I could re-apply any wet media to the stitched page and print some more with it.  The acrylic paint will have waterproofed it to a certain extent.

I really loved this technique and plan to use it again in the future.  I also thought of printing a digital image of the last print onto fabric (using cotton lawn treated with Bubble Jet and ironed onto freezer paper) and stitching into it.  I like the idea of stitching into something which has been printed from stitch.  This multi-layer approach reflects the many layers in the garden.  It would also be interesting to print onto thin paper from the stitched page using transfer dyes and then iron it onto fabric.  Taking a rubbing from the stitched page is another possibility to try.  (All I need is a few more hours in the day and a few more days in the week!)

It is so interesting how many of the techniques I've learned in this sketchbook project have sparked off new ideas and ways of working which will keep me happily occupied for a long time to come.  Thank you Sian for the ideas and for all the hard work you have done in keeping the project going.  I am looking forward to the next sketchbook project in September.

In the meantime, I need to re-apply myself to my neglected coursework, inspired by the many new ideas from the sketchbook project which I hope I can incorporate in it.

Sunday 21 August 2011

Sketchbook days 28, 29 Monoprints

I chose a selection of cylindrical objects to draw.  I chose tins and jars from the kitchen with a variety of heights and diameters.

I first tried a light pencil drawing of the objects.  Then I put some green acrylic paint on a sheet of glass and rolled it to give an even covering.  I placed this under the page of my sketchbook with the drawing and went over the lines again, giving a reversed print on the back.  I had forgotten Sian's tip about using a drop of detergent in the paint to make it spread more easily and to delay drying.  I found therefore that the paint dried too quickly to get a good print.


I tried again with a different brand of acrylic paint.  I also used more paint.  This gave a more satisfying result and I liked the accidental texture which was produced.


The left hand picture above shows the imprint left on the glass after the drawing had been made.  The right hand picture shows the print made from it.  Unfortunately, again the paint dried too quickly in a warm room.


I tried again with yet a different brand of acrylic paint.  This had a slightly more runny consistency and seemed to work quite well.  I quite like the vague shadowy quality.


The above shows a different technique, when I painted the shapes onto the glass sheet and took a print from it.  I quite like the faded portions.  It would take a bit of experimentation to find just the optimum balance of wet/dry of the paint before taking the print.  I could also experiment with the pressure on the paper.  In this case I just used pressure from my hand.  I like the top of the container at the front left of the drawing above.


I remembered that I had some water-based printing ink from some years ago and looked it out to try.  It had lasted well and was still usable.  It had a much longer drying time and gave a very satisfactory result, although I thought I had used a bit too much ink.


I tried re-rolling the paint on the glass sheet without adding any more and drew the shapes again.  This gave a more satisfying result.  I think it worked best of all my attempts and I am very pleased with it.


Lastly, I spread more printing ink on the glass sheet and drew into it with a cotton bud and the wooden end of a paintbrush.  I took four prints from it, the first two above using just the pressure of my hand and the final two using a roller with firm pressure.  I was quite pleased with these, the second one, I think being best.

I really enjoyed today's exercise.  It totally involved me with a sense of play and enjoyment and made me forget temporarily a headache and sore throat.  There remain some more ideas I'd like to try using monoprints so I shall return for another day of play some time.

Saturday 20 August 2011

Sketchbook day 27 carbon copies continued

In this exercise I scribbled all over a page of printer paper with an 8B pencil and then laid it graphite side down on top of a sketchbook page and drew on the back with a biro.  This transferred the graphite drawing onto the page of the sketchbook.


I like the technique here, but I wasn't too happy with my own drawing.  I found it very hard to get the proportions of the chair right.  Also in the second drawing, I didn't fill the whole sheet with graphite and it ran out for the bottom of the drawing.  I worked some more into this drawing, correcting some of the proportions and adding the missing part of the chair legs.

Finally I tried drawing into the graphite with a rubber. 


However by this time I was getting tired, and wasn't happy at all with the drawing.  Will try another day covering a page with graphite and drawing into it with a rubber.  Meanwhile afternoon tea beckons ...